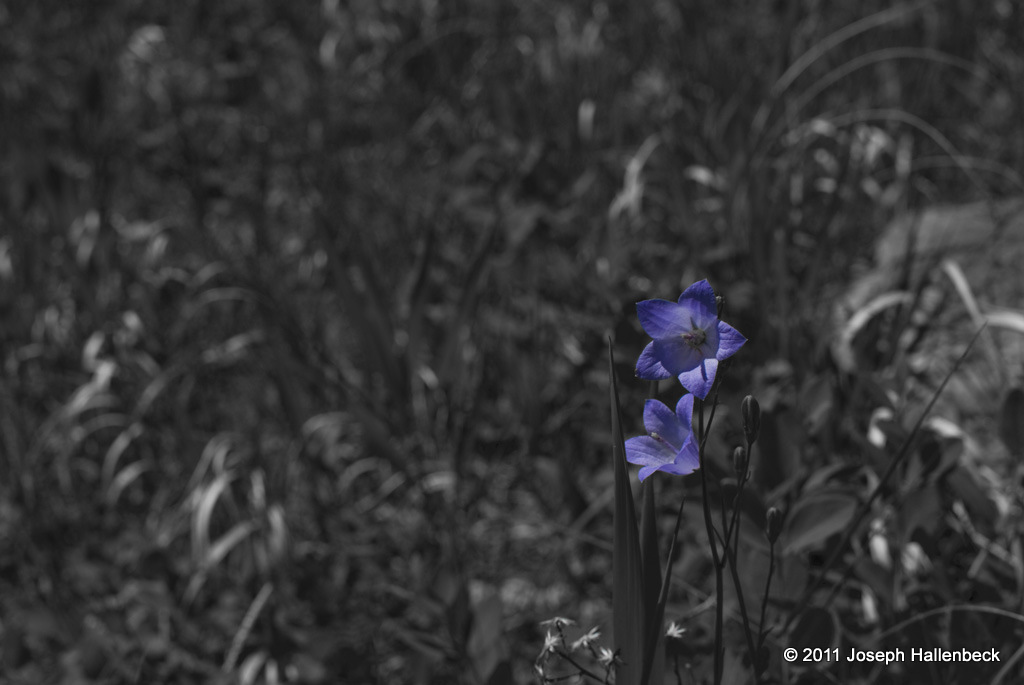
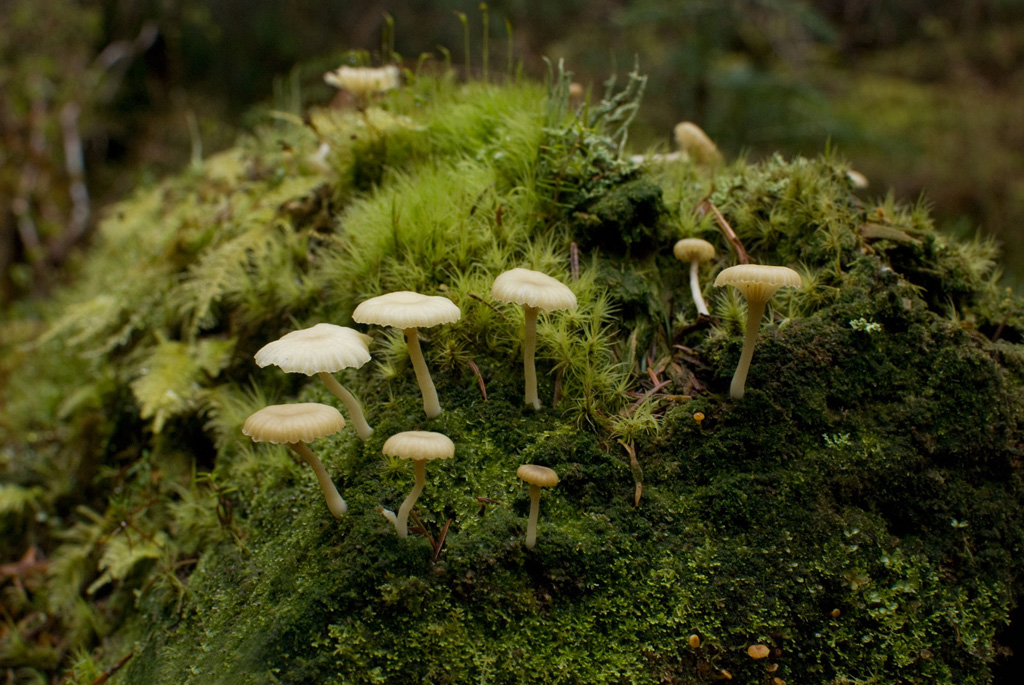
Drawing and Photography
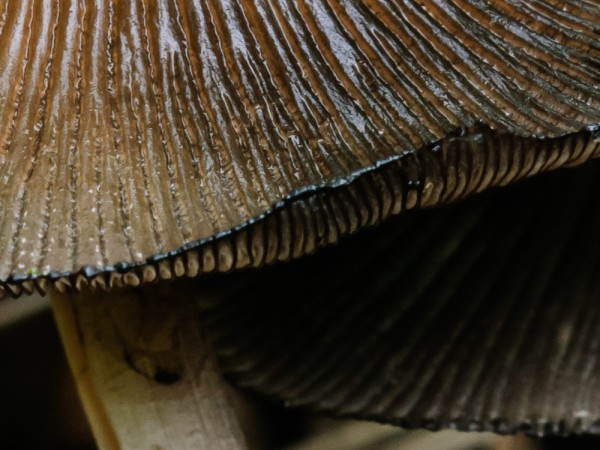
Macro photos of the flowers Jess got me for Valentine’s day last month. A good
chance for practicing macro stacking as well.
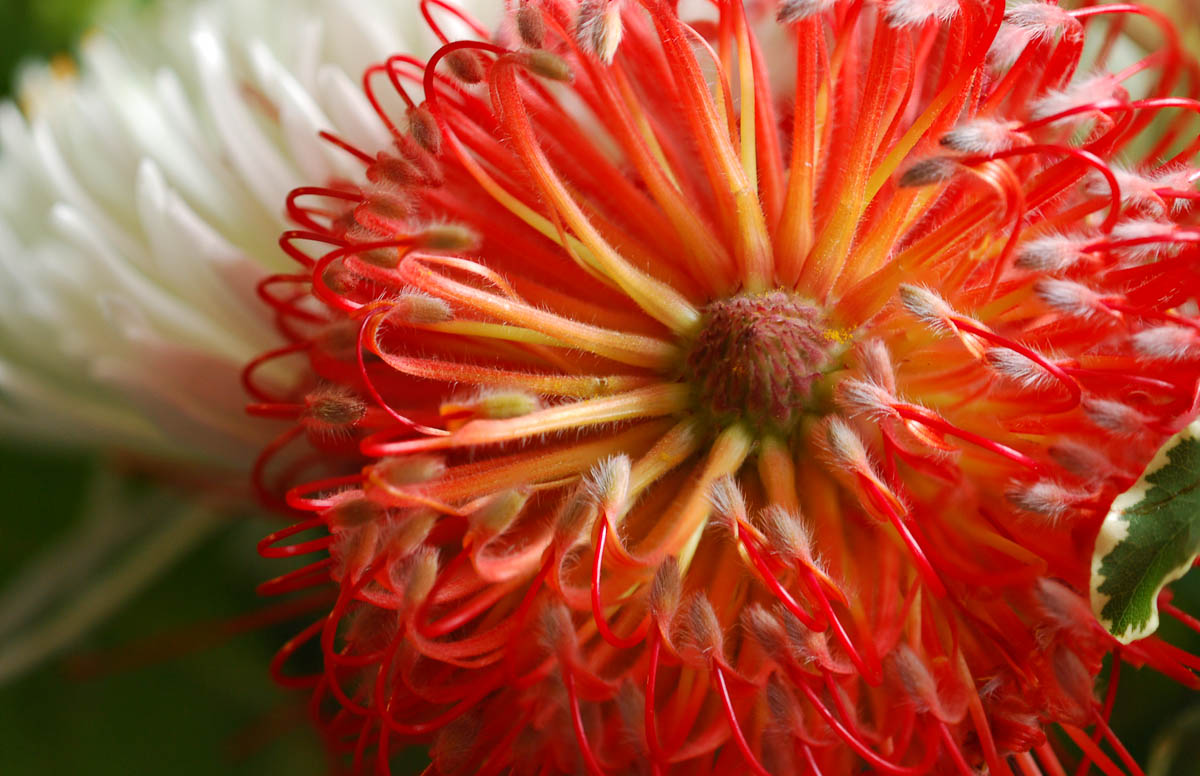
Model: Nikon D80 /w Nikon 200mm f/4.0 AF-S FX
Shutter: 1/25 sec
F-Stop: f/4.2
ISO: 320
Focal Length: 200mm
Lighting: None
Stack: 5
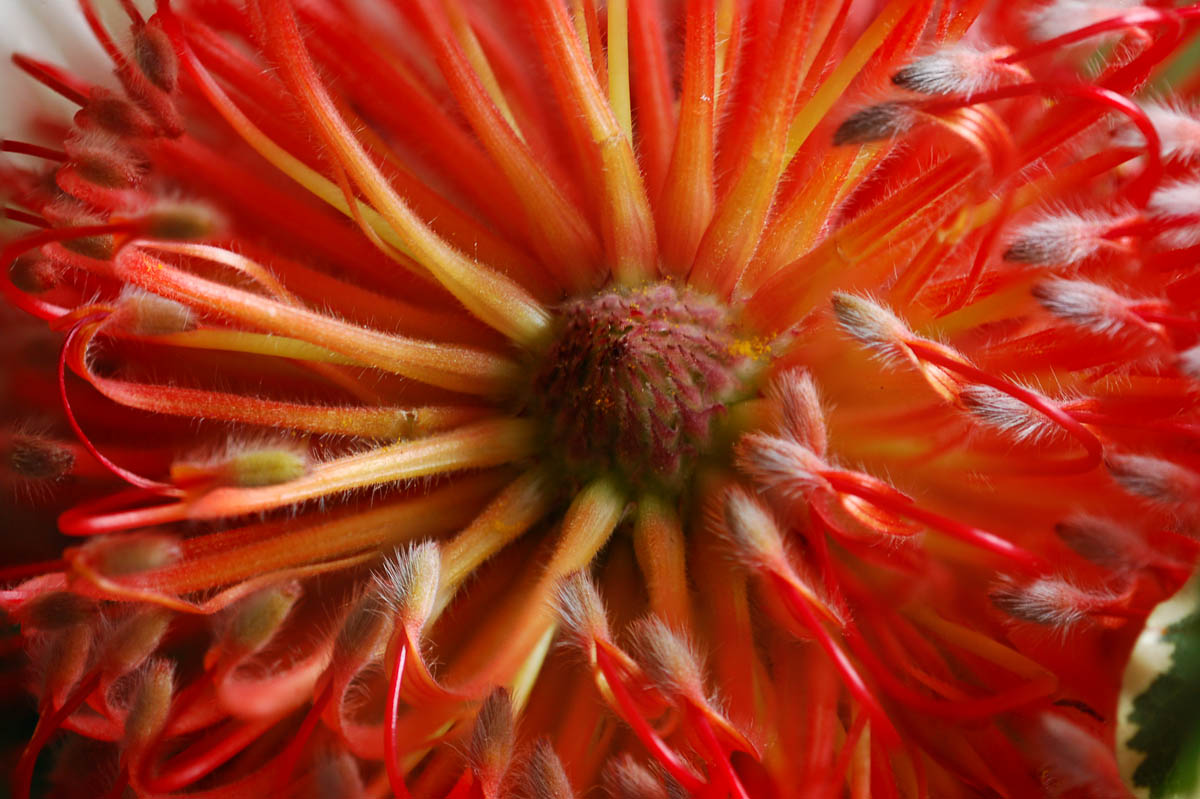
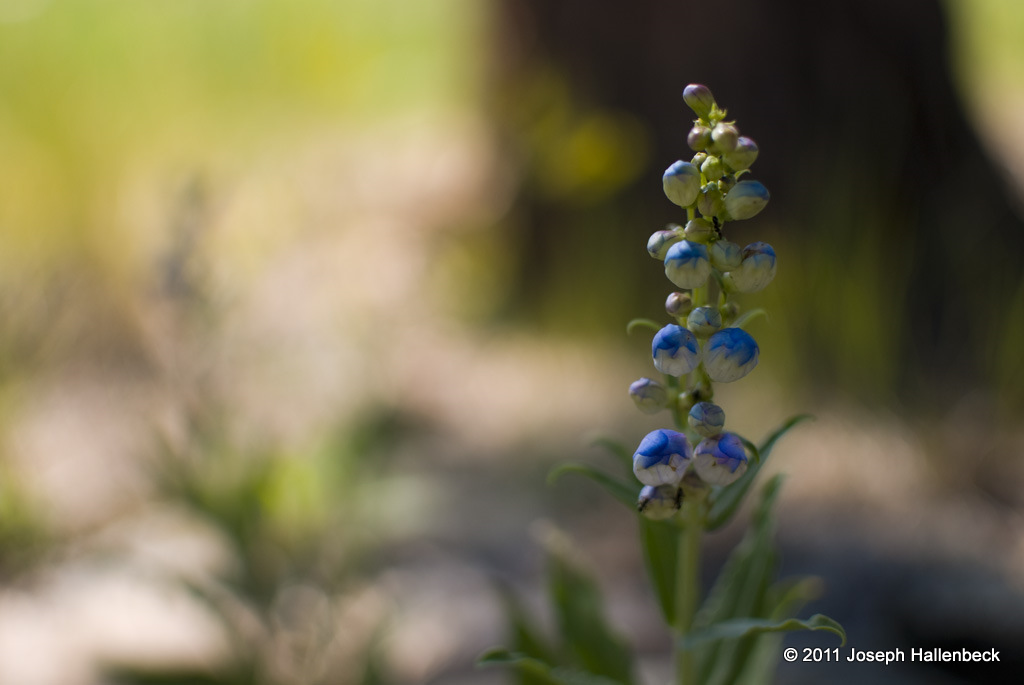
Model: Nikon D80 /w Nikon 200mm f/4.0 AF-S FX
Shutter: 1/13 sec
F-Stop: f/4.5
ISO: 320
Focal Length: 200mm
Lighting: None
Stack: 6
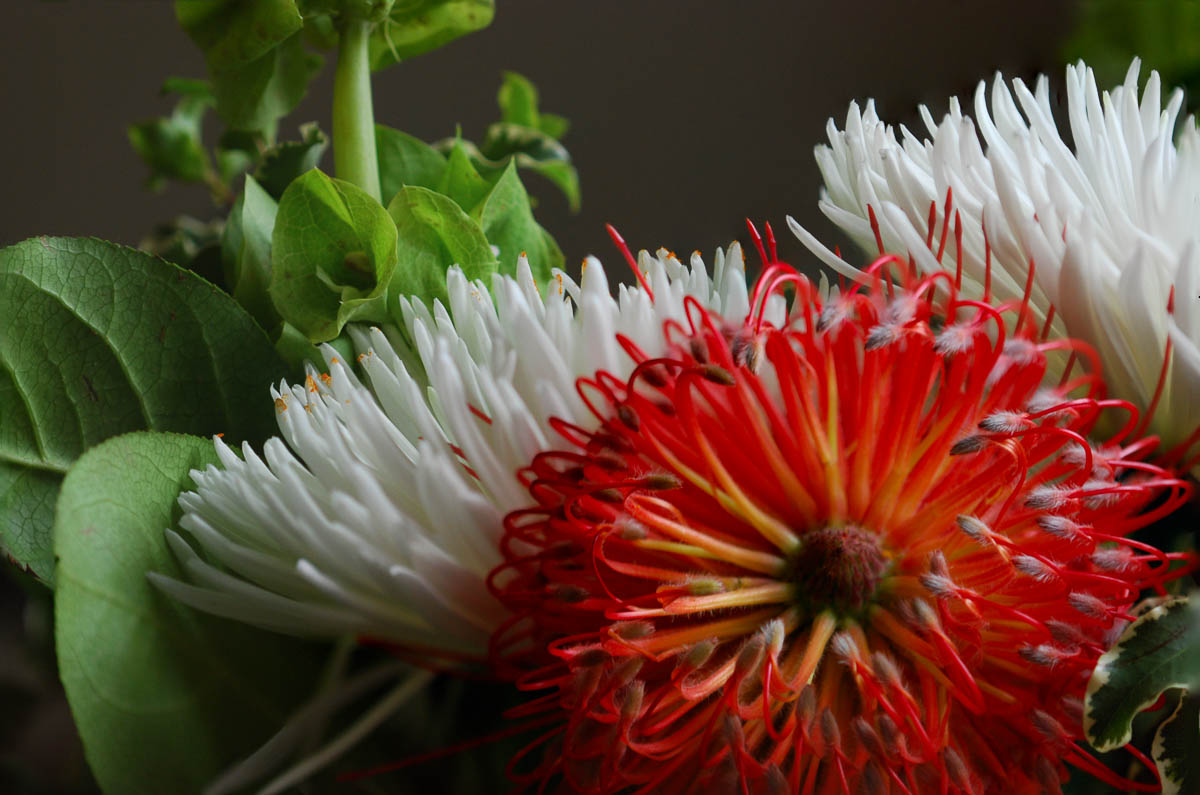
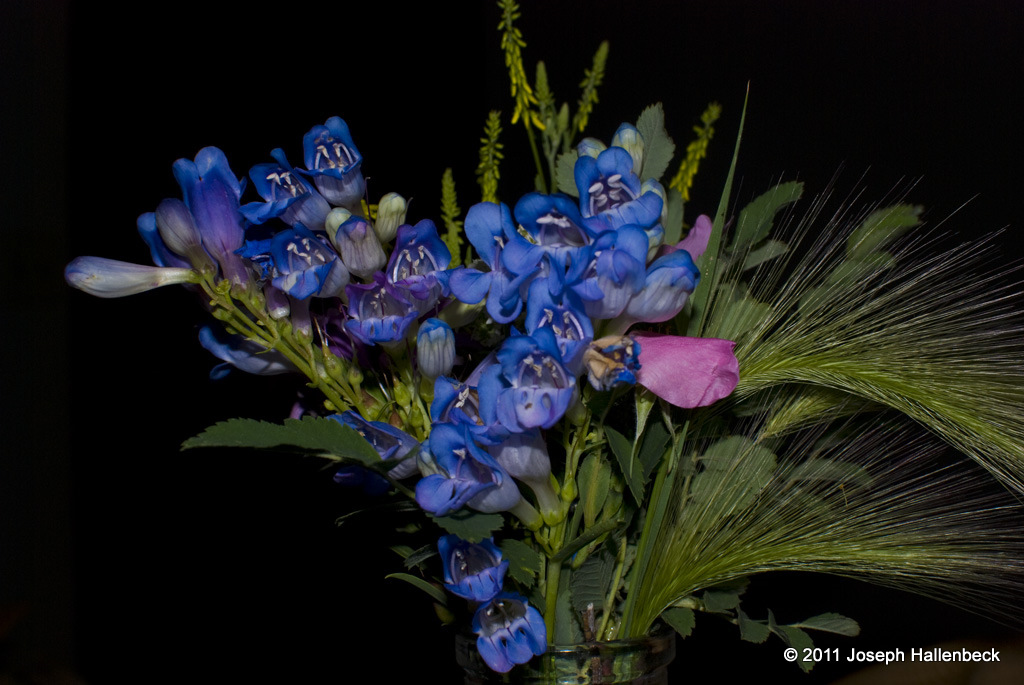
Model: Nikon D80 /w Nikon 200mm f/4.0 AF-S FX
Shutter: 1/25 sec
F-Stop: f/4.2
ISO: 320
Focal Length: 200mm
Lighting: None
Stack: 3
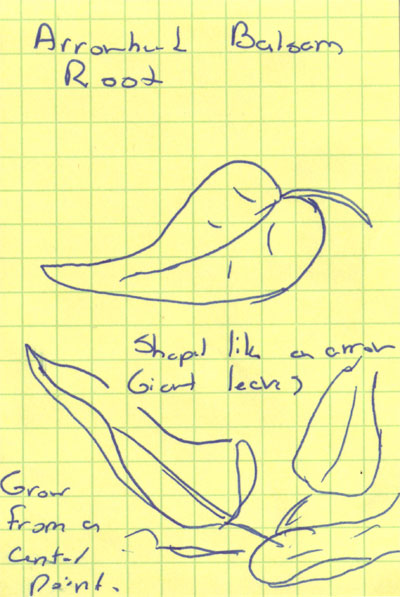
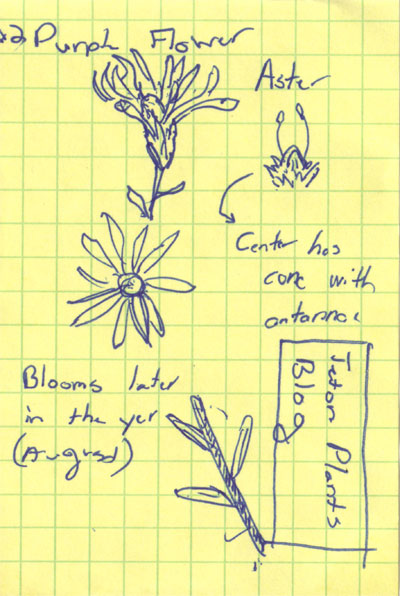
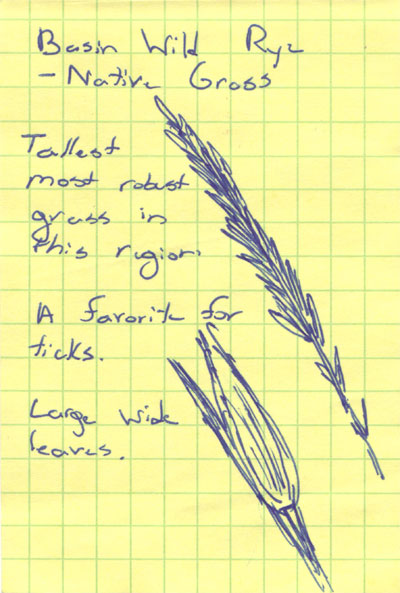
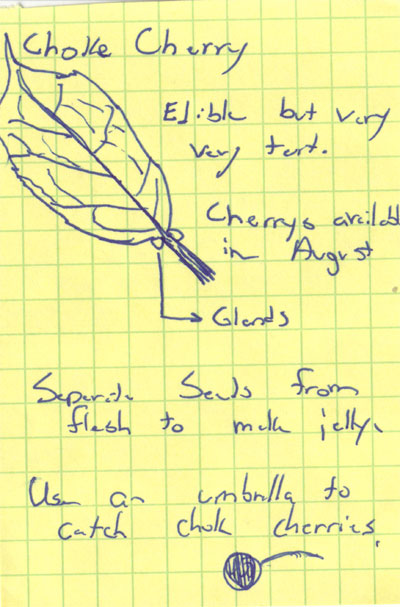
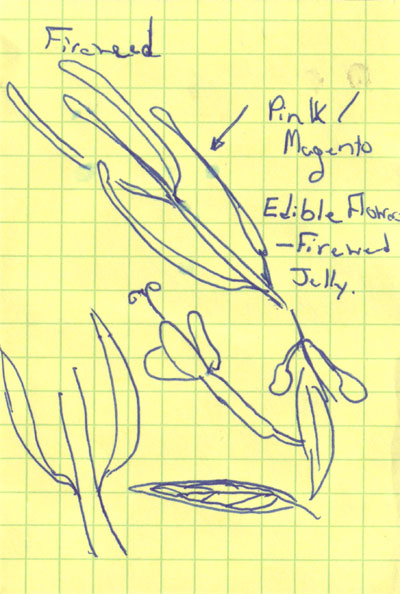
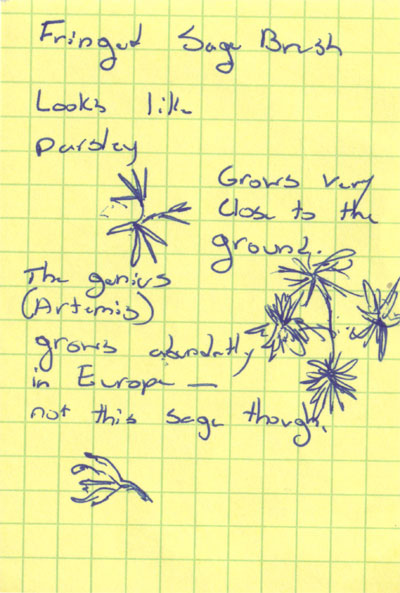
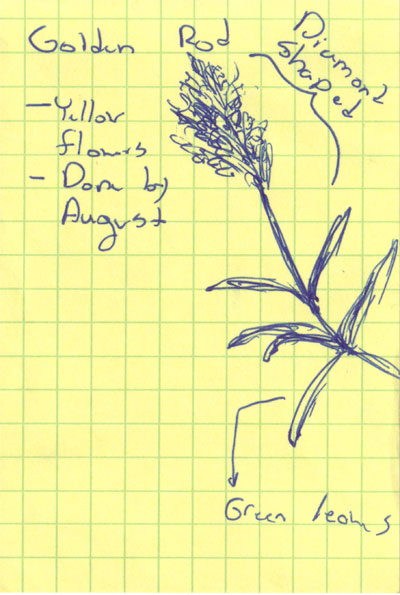
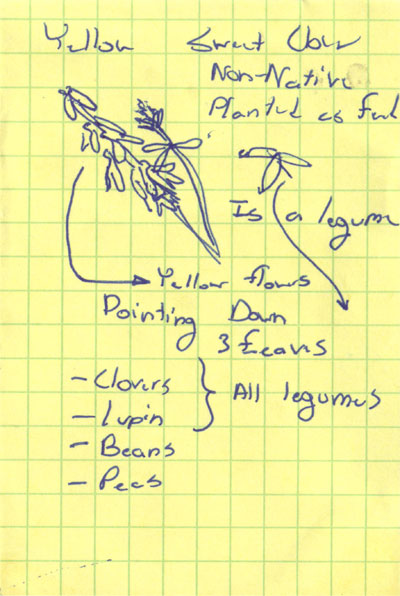
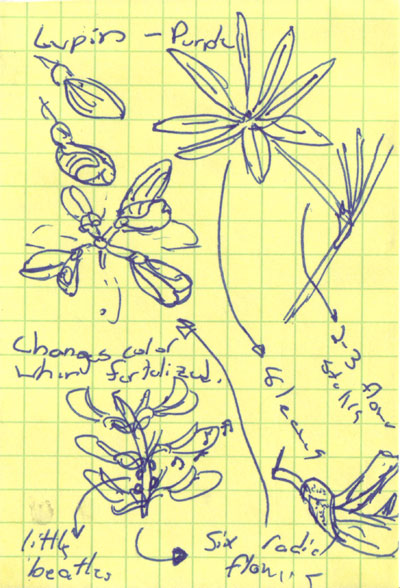
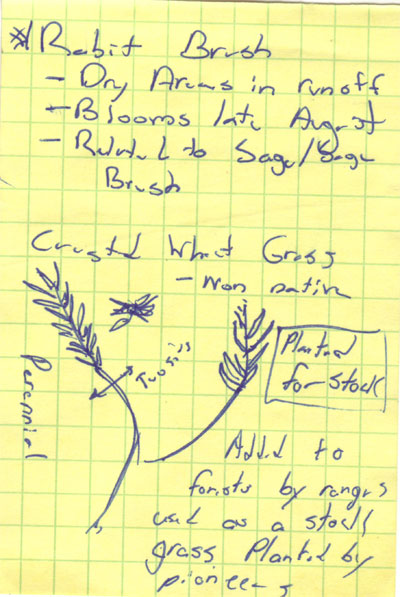
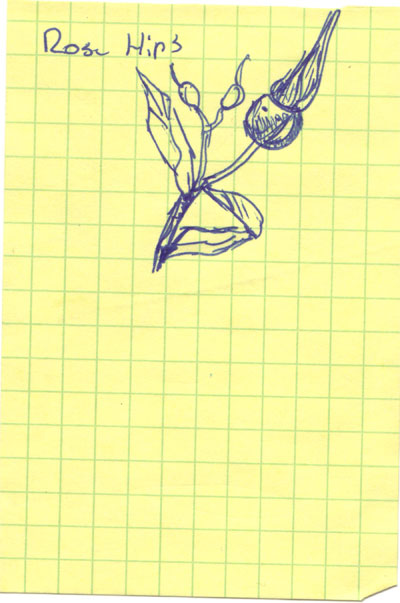
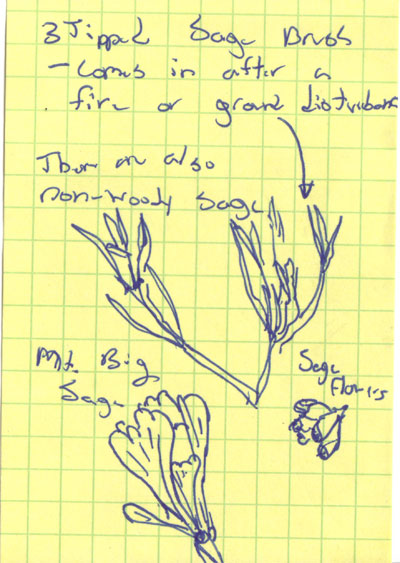
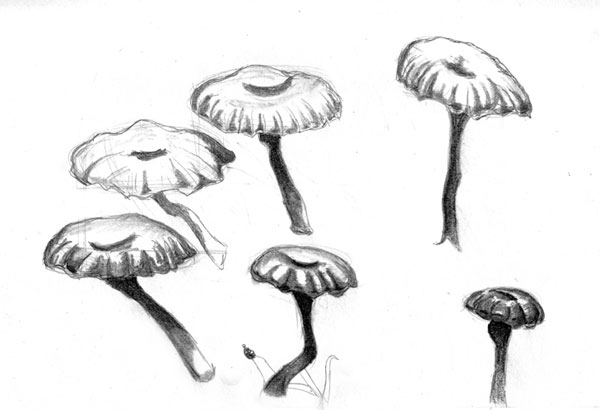
The following sketches are from my field notebook. They were done while taking a
native plants class with Klara Varga in Jackson Hole. In particular, these
plants were all found growing along the roadway through the Elk Refuge.

North of the open dunes is North Juniper Hill, the tallest of the St. Anthony
Sand dunes at 6,625 ft and a rise of roughly 1,000 feet above the surrounding
fields. It’s sandy all the way up to the top. We took two days backpacking, this
photo is a cropping of a 360 degree panorama of 21 stitched images.

North Juniper Hill
Model: Nikon D80 /w Nikon 35mm f/1.8 AF-S DX
Shutter: 1/320 sec
F-Stop: f/9
ISO: 250
Focal Length: 35mm
Lighting: None
Stitches: 21
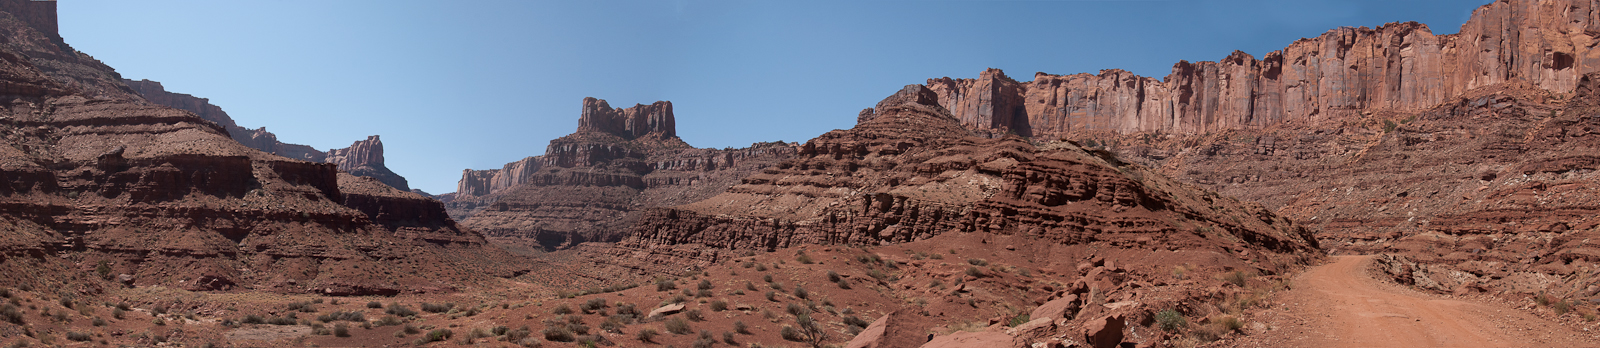
The St. Anthony Sand Dunes west of St. Anthony, Idaho are perhaps one of the
hidden gems out here. It took us almost a year to bother checking them out due
to all the talk of ATV use. It is true, the dunes are infested with ATV droning
on, but by late evening it seems like they die down and leave a little peace and
quite. The dunes themselves are quite impressive, we thought we would be seeing
some small dunes or patches of sand, instead we found massive open dunes rising
300 feet above the nearby potato fields. The one on the right measures out at
about 320 feet and took crawling on our hands and knees to ascend to the peak.

St. Anthony Sand Dunes
Model: Nikon D80 /w Nikon 35mm f/1.8 AF-S DX
Shutter: 1/320 sec
F-Stop: f/9
ISO: 250
Focal Length: 35mm
Lighting: None
Stitches: 14
I was just going through my photos from my return trip to the Southwest which
included Arches, Canyonlands, Escalante, Capitol Reef, and Bryce Canyon. For
some odd reason, I was not in a big photography mood despite loading up all of
my equipment. I left my camera behind on the backpacking portion and only
stopped to quickly snap a few panoramas along the way. I’ve included those
panoramas below. I find myself wishing that I had taken more time with them.
Perhaps with a little more editing in post, I could bring them out.
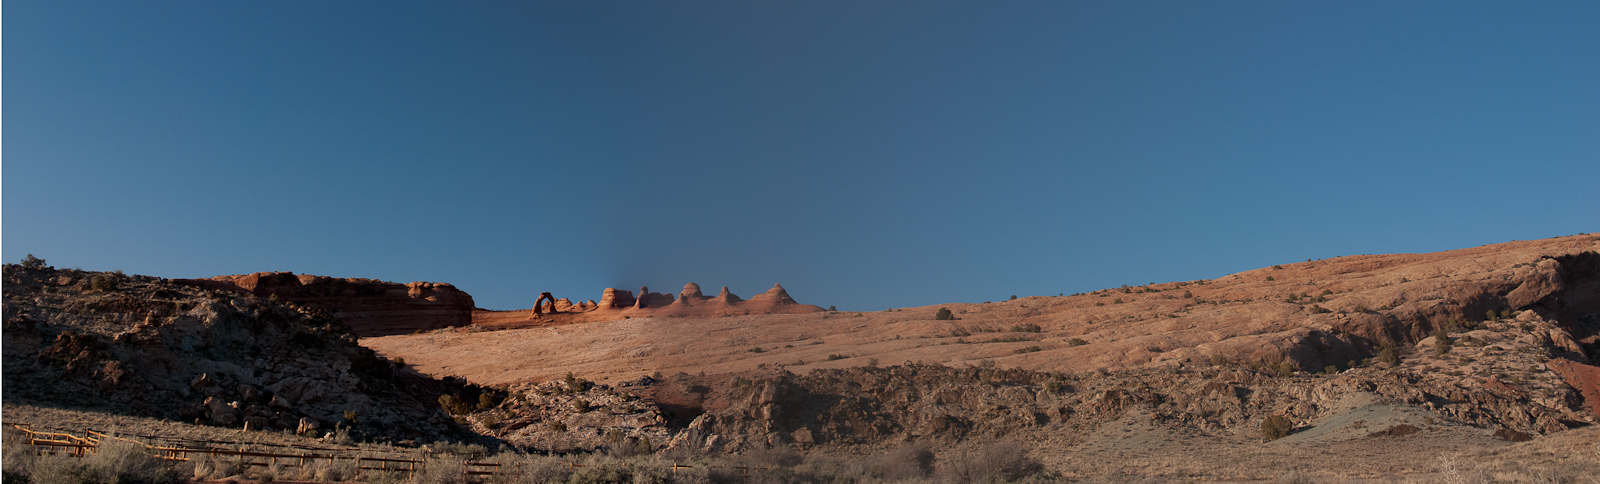
Delicate Arch, Arches National Park
Model: Nikon D80 /w Nikon 35mm f/1.8 AF-S DX
Shutter: 1/320 sec
F-Stop: f/9
ISO: 400
Focal Length: 35mm
Lighting: None

Isle of the Sky, Canyonlands
Model: Nikon D80 /w Nikon 35mm f/1.8 AF-S DX
Shutter: 1/320 sec
F-Stop: f/9
ISO: 400
Focal Length: 35mm
Lighting: None
Jug Arch Road, Moab
Model: Nikon D80 /w Nikon 35mm f/1.8 AF-S DX
Shutter: 1/320 sec
F-Stop: f/9
ISO: 400
Focal Length: 35mm
Lighting: None

BLM Camping, Capitol Reef National Park
Model: Nikon D80 /w Nikon 35mm f/1.8 AF-S DX
Shutter: 1/160 sec
F-Stop: f/7.1
ISO: 400
Focal Length: 35mm
Lighting: None

Hogback, Escalante National Monument
Model: Nikon D80 /w Nikon 35mm f/1.8 AF-S DX
Shutter: 1/250 sec
F-Stop: f/8
ISO: 400
Focal Length: 35mm
Lighting: None
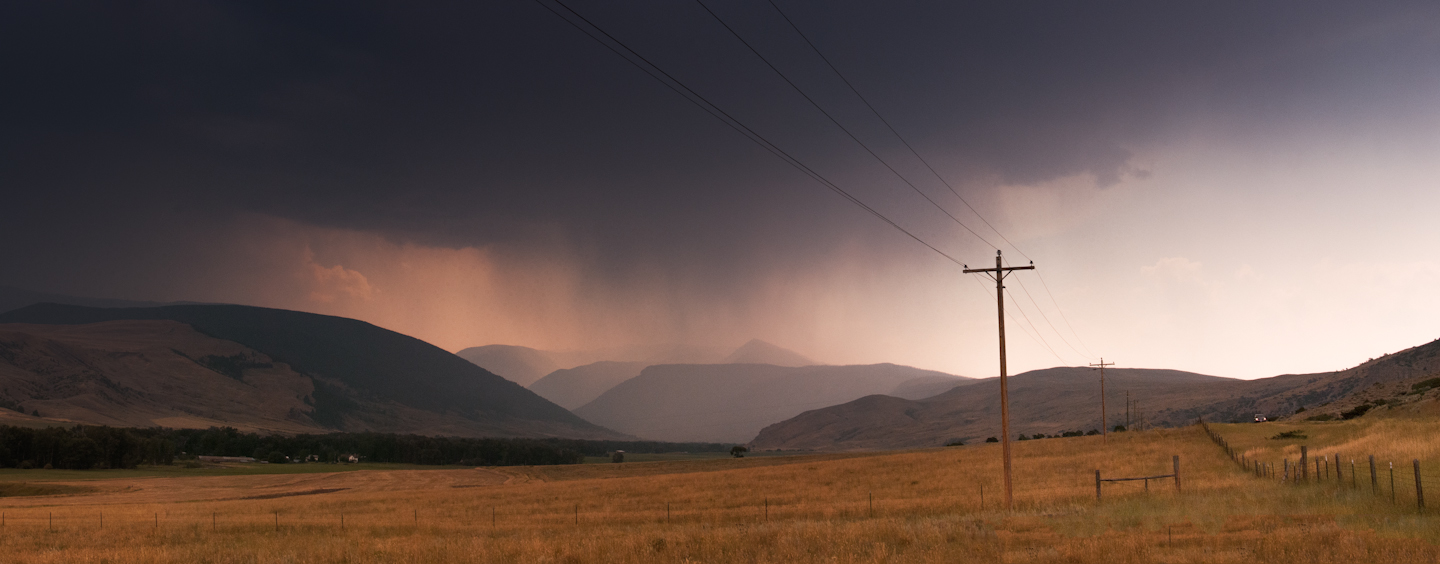
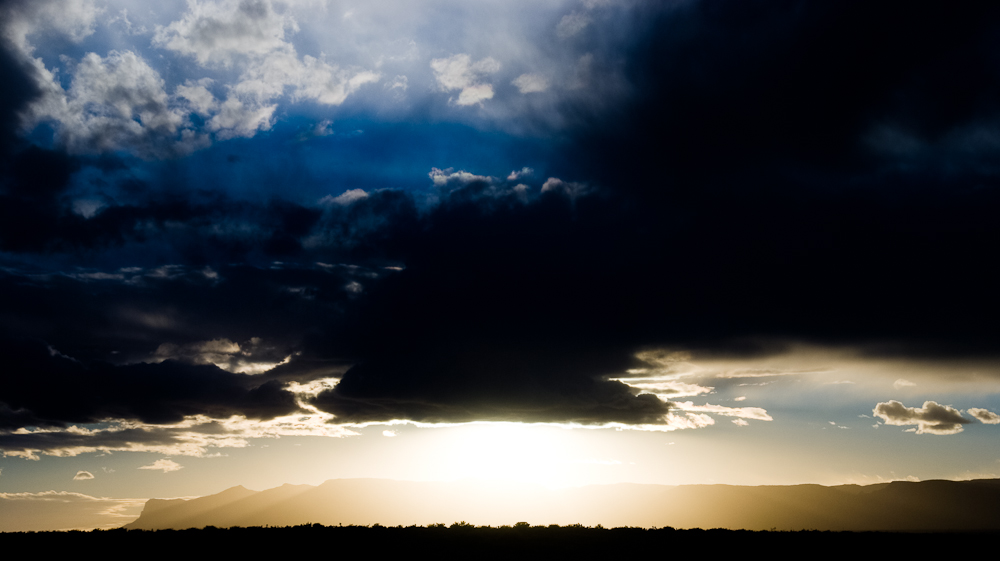
Perhaps one of the most scenic diversions from I-90 when driving across
Montana. A turn off at Big Timber and head south arcing along W. Boulder Road
to Livingston. In this instance, I caught a freak ranstorm that was coming down
over the wilderness.
Settings
Model: Nikon D80 /w Nikon 35mm f/1.8 AF-S DX
Shutter: 1/160 sec
Exposure Program: Manual
F-Stop: f/9
ISO: 400
Focal Length: 35mm
Lighting: None
No of Stitched Photos 4

I have taken to experimenting with stitching panoramic images together. The one
above is of Bear Lake in September of this year. We sped around the lake at
sunset hoping to get to the eastern shore in time for the shot. I ran out of
the truck down onto the stony beach and started shooting.
The resulting photo has has had little post work done in lightroom, but was
stitched together using photoshop with a dash of content aware fill to fill in
where the distortion curved down into the blue sky and took out a chunk of the
right-most mountain.
Settings
Model: Nikon D80 /w Nikon 35mm f/1.8 AF-S DX
Shutter: 1/160 sec
Exposure Program: Manual
F-Stop: f/9
ISO: 400
Focal Length: 35mm
Lighting: None
No of Stitched Photos 4
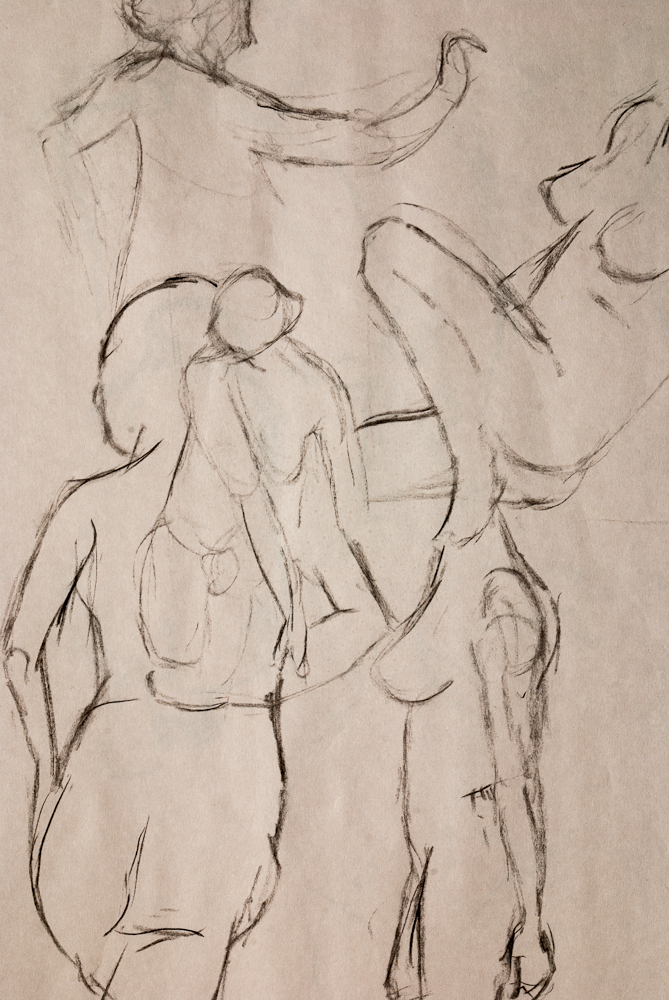
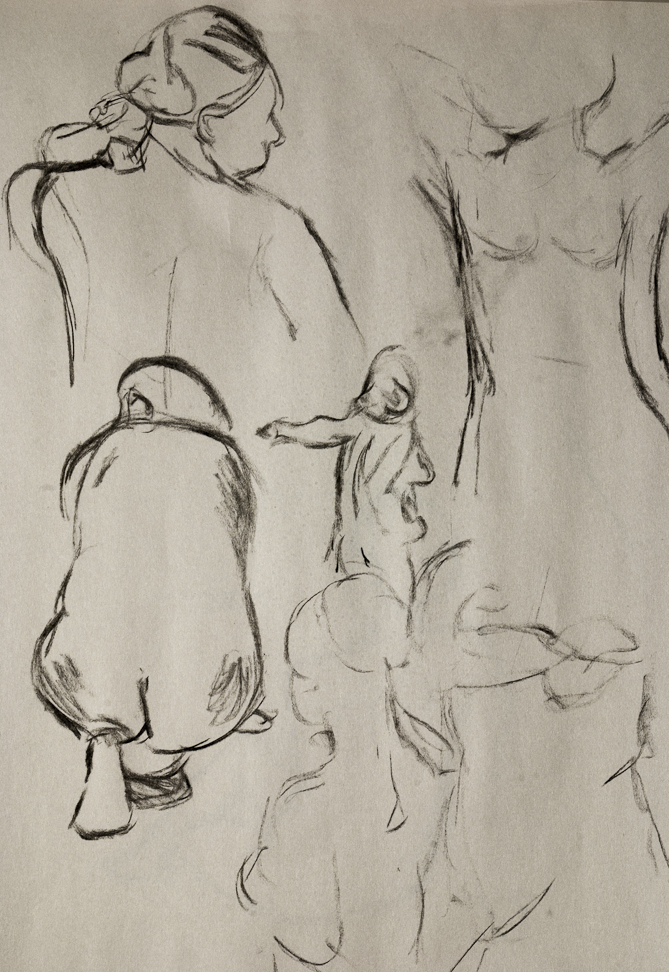
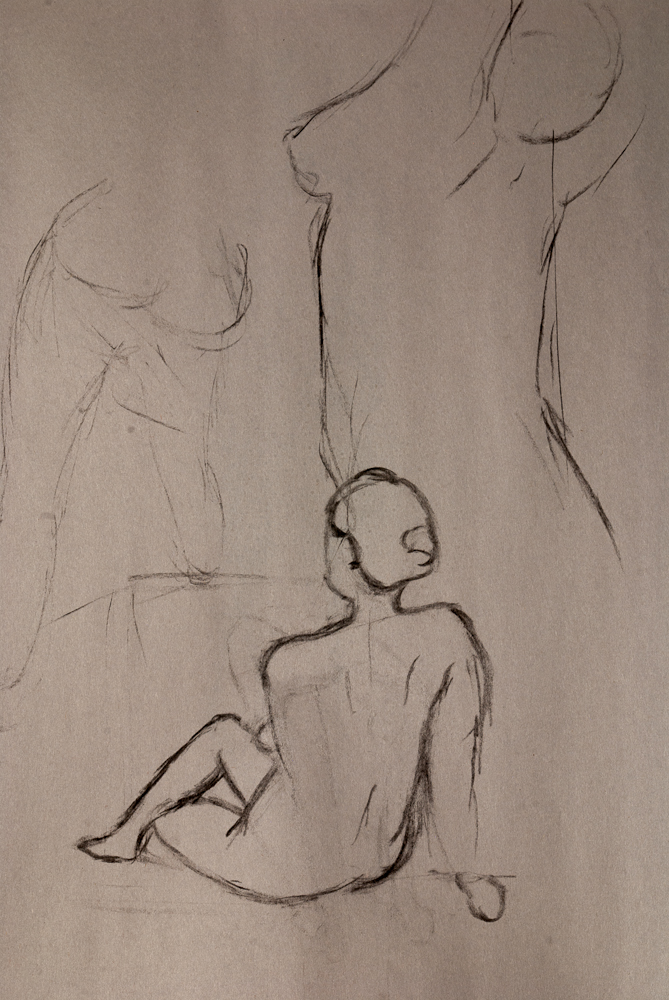
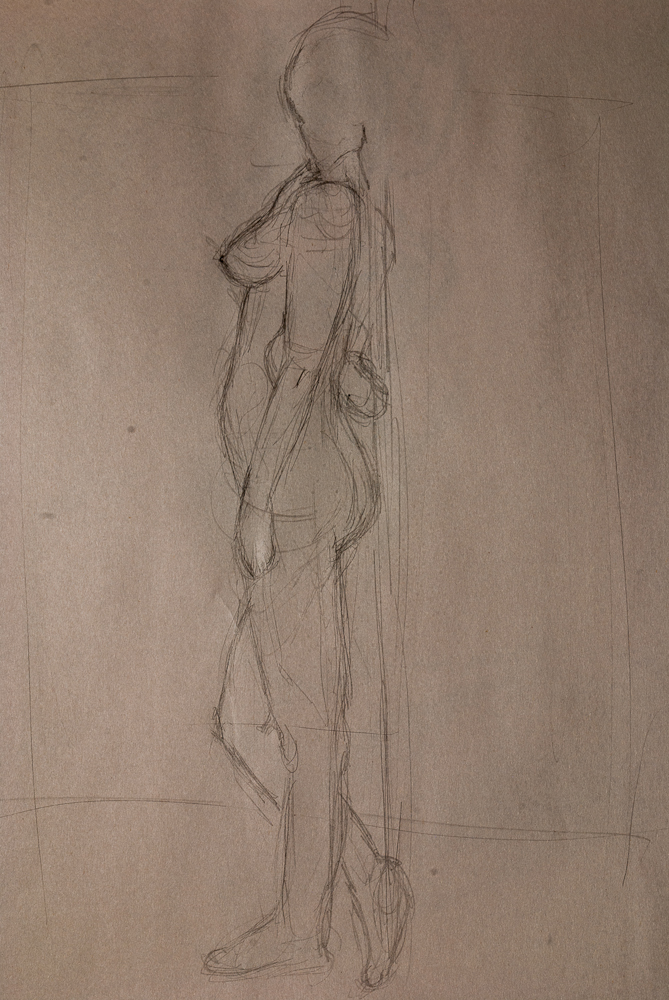
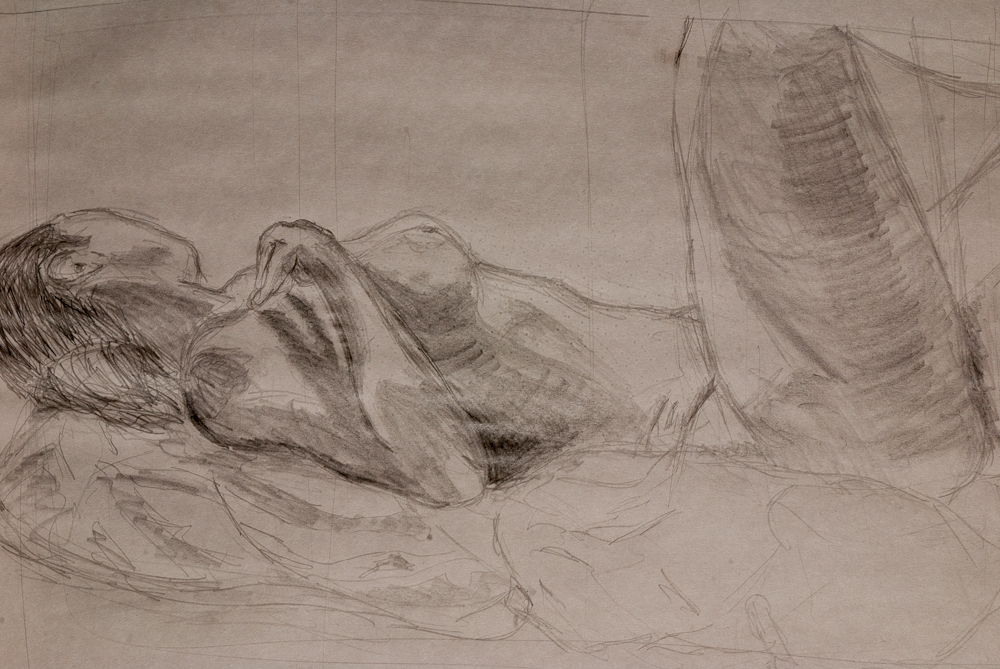
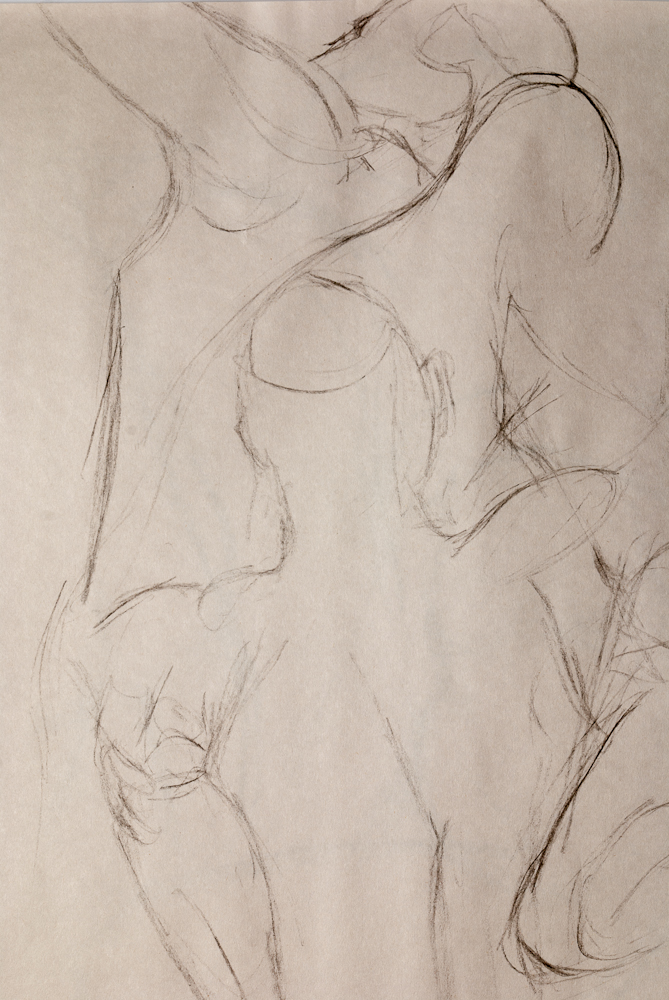
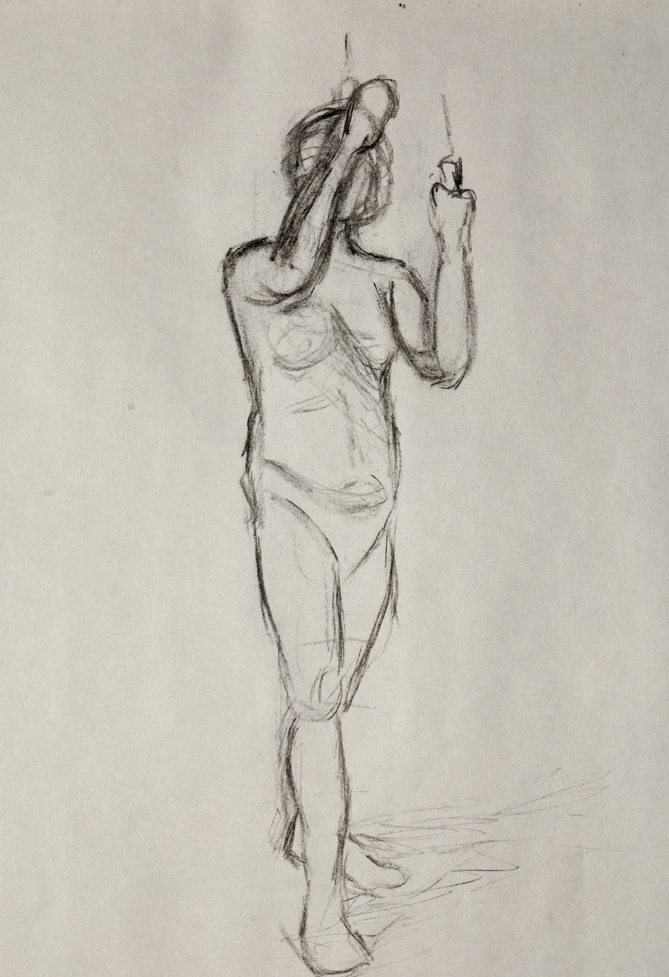
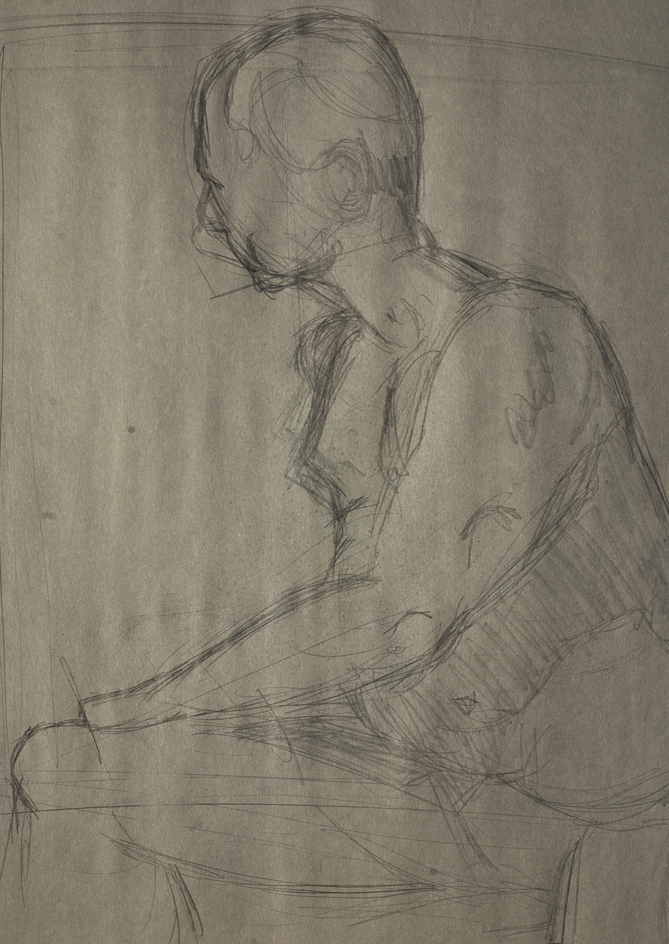
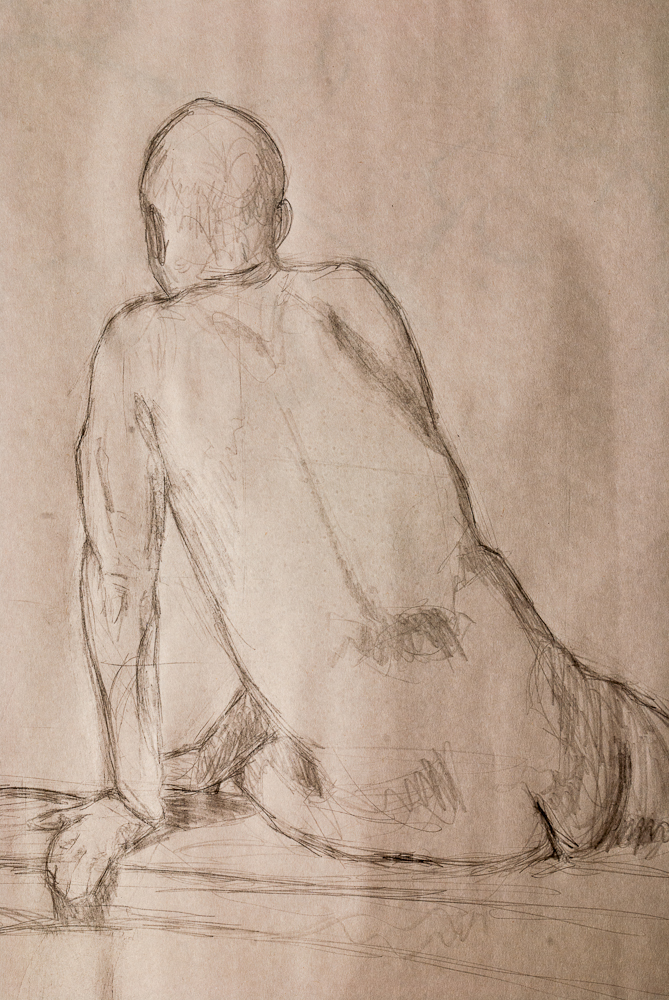
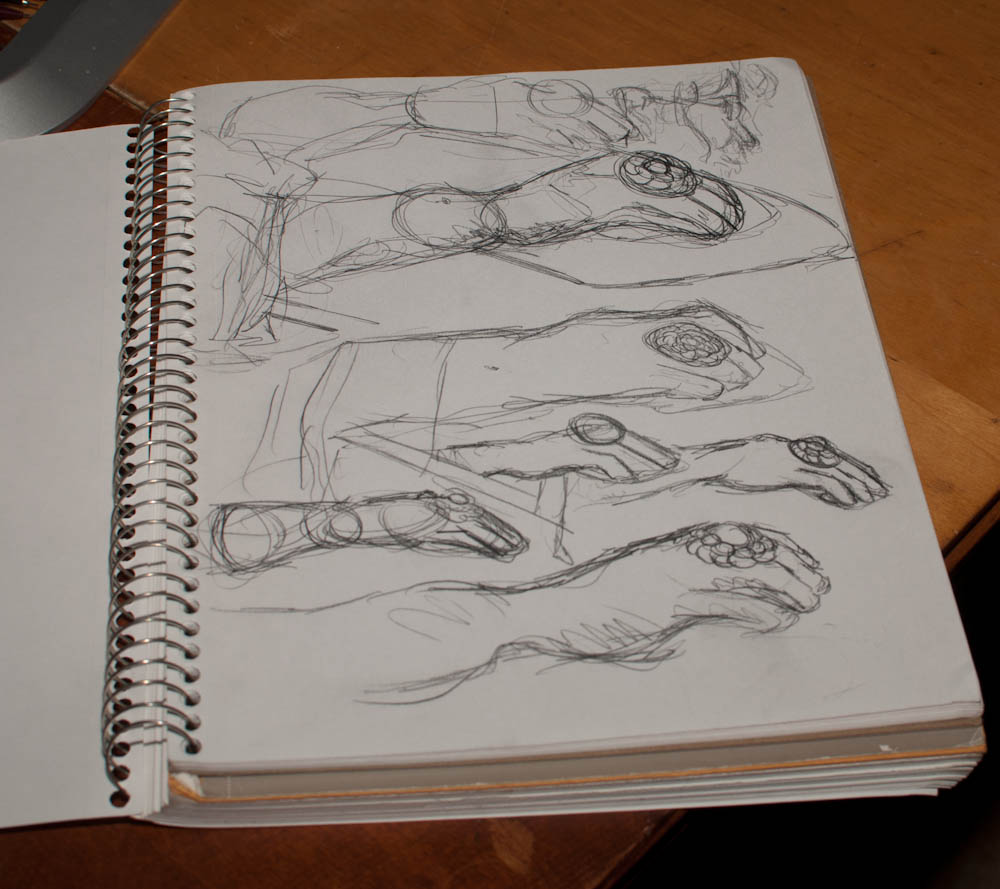
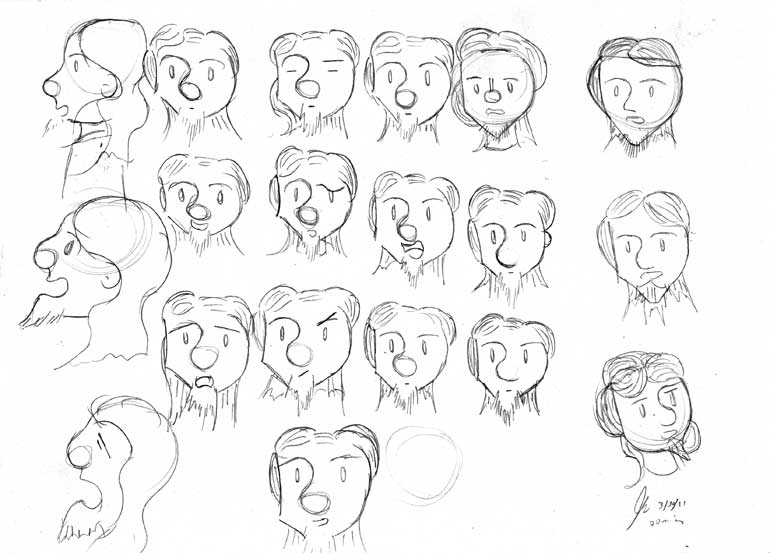
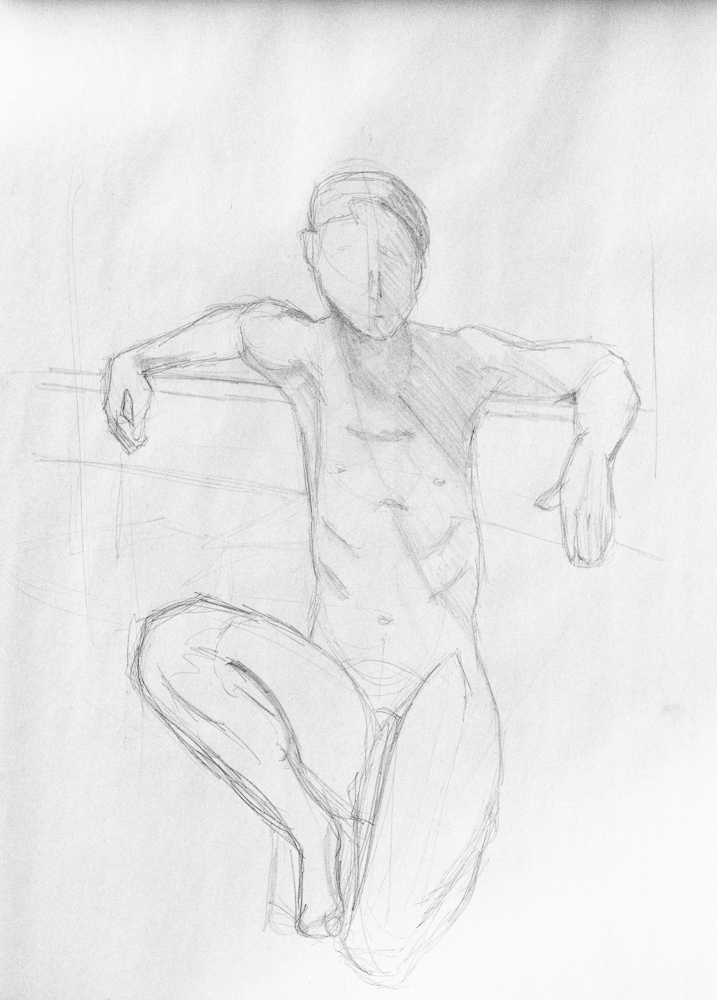
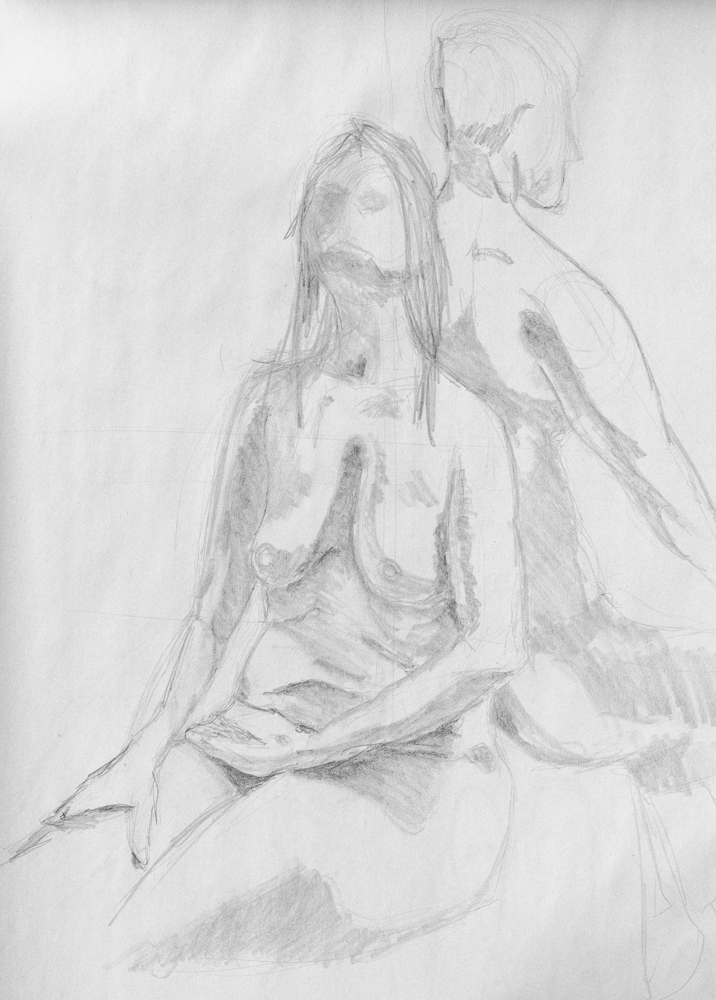
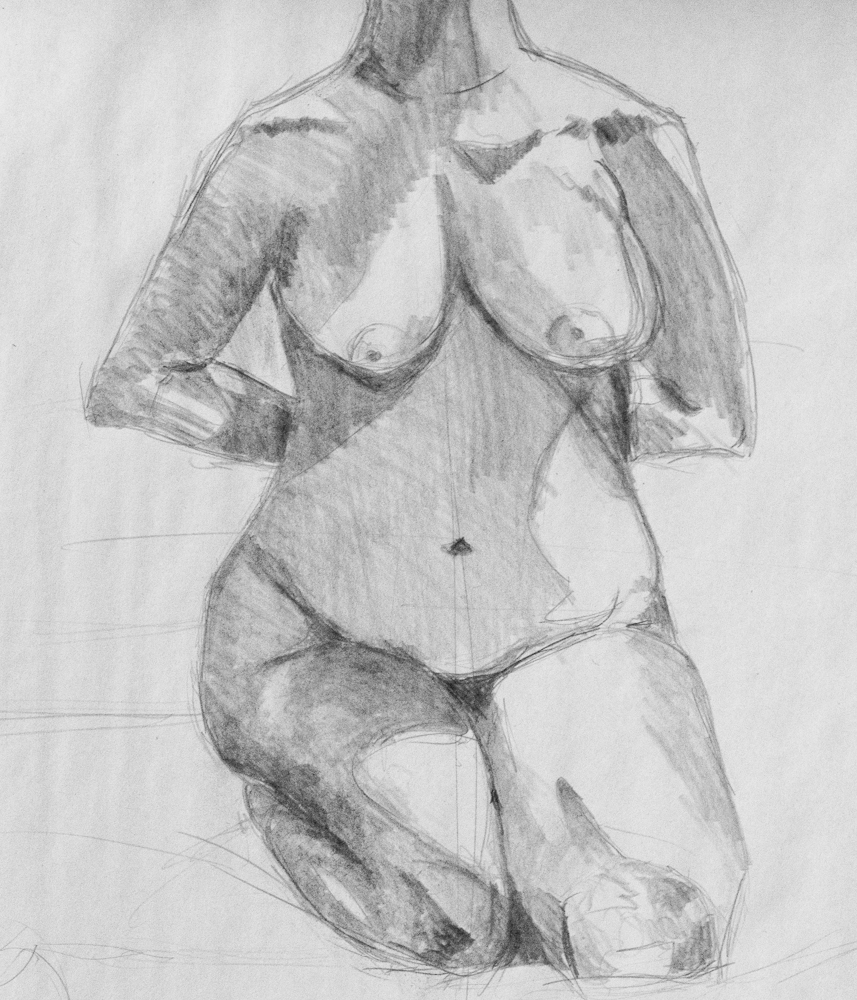
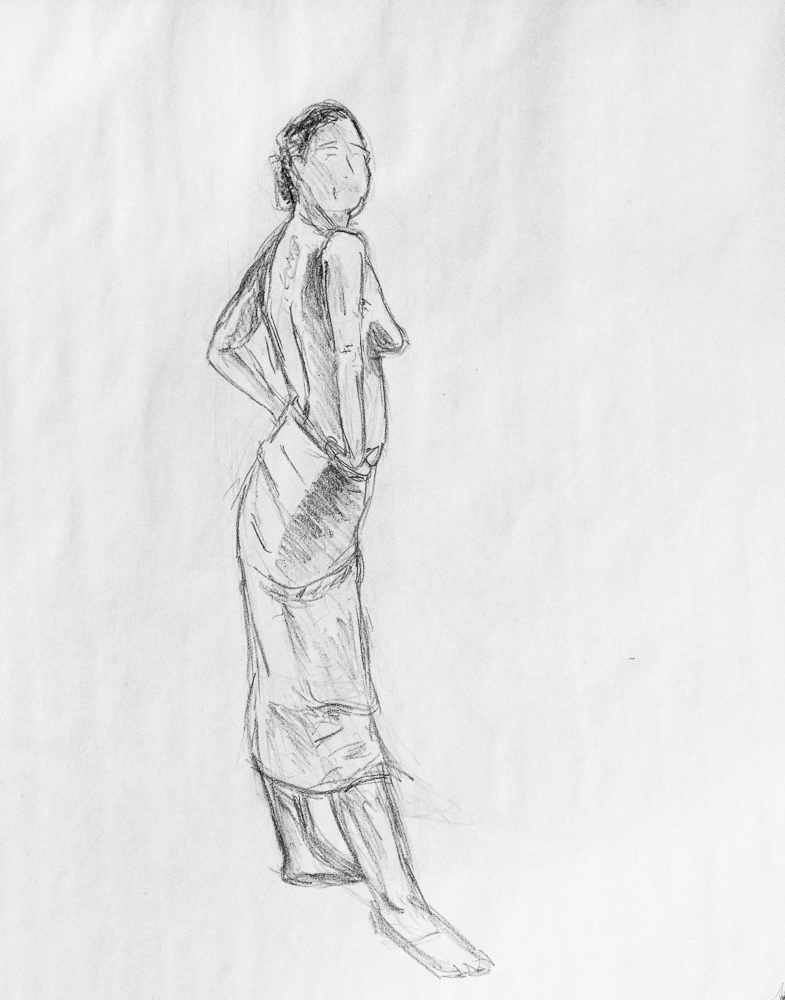
It has been almost one year exactly since I posted my progress in attending the
life studies group in Sioux Falls. I did not attend nearly as much as I had
hoped last year. Indeed, with heavy overtime through the fall and only a
scattering of visits last winter followed by an outright abstinence through the
spring and into early summer – I am surprised that I have this many sketches to
scrap up and post.


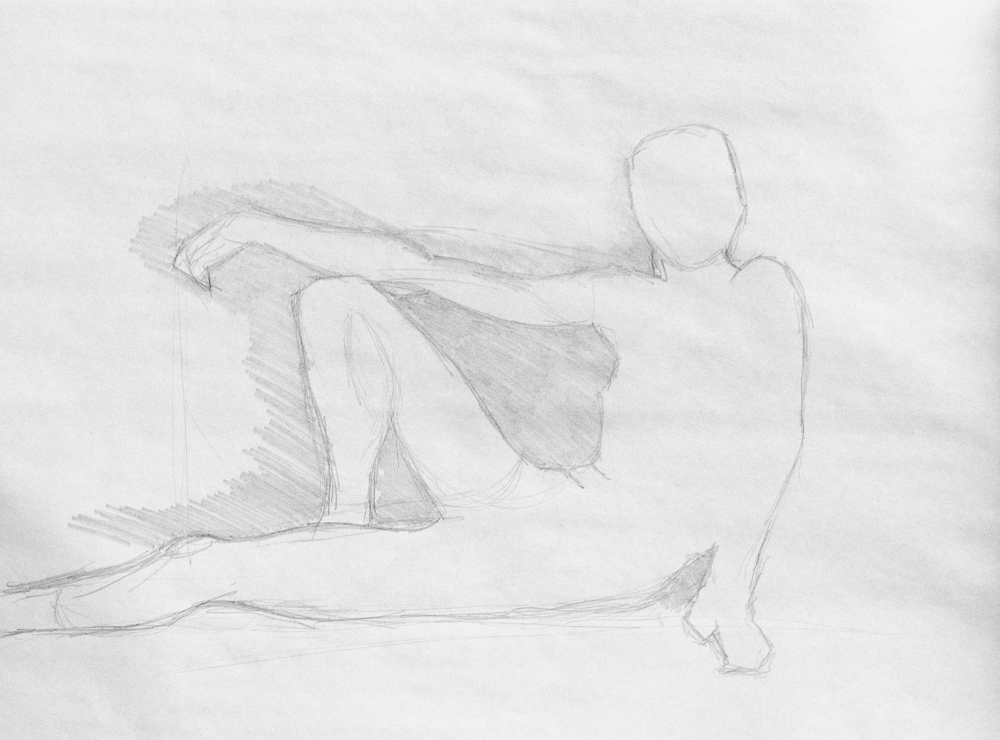
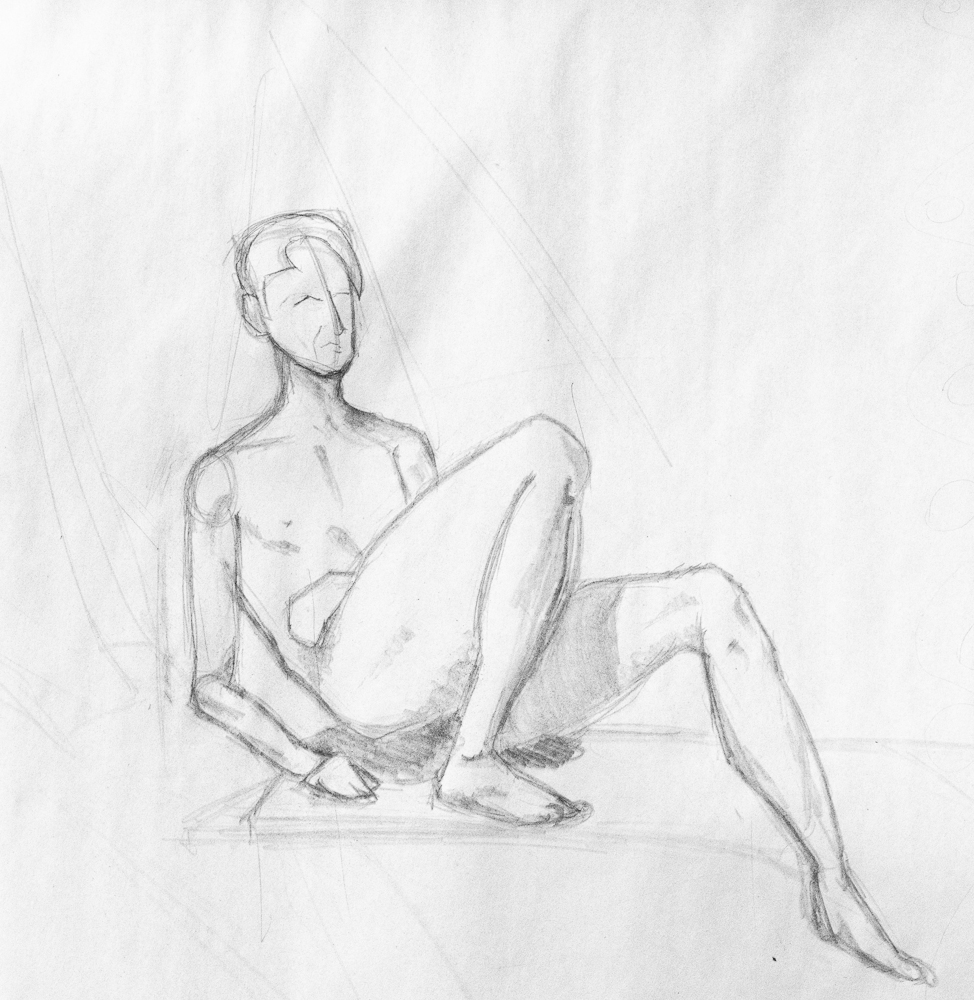

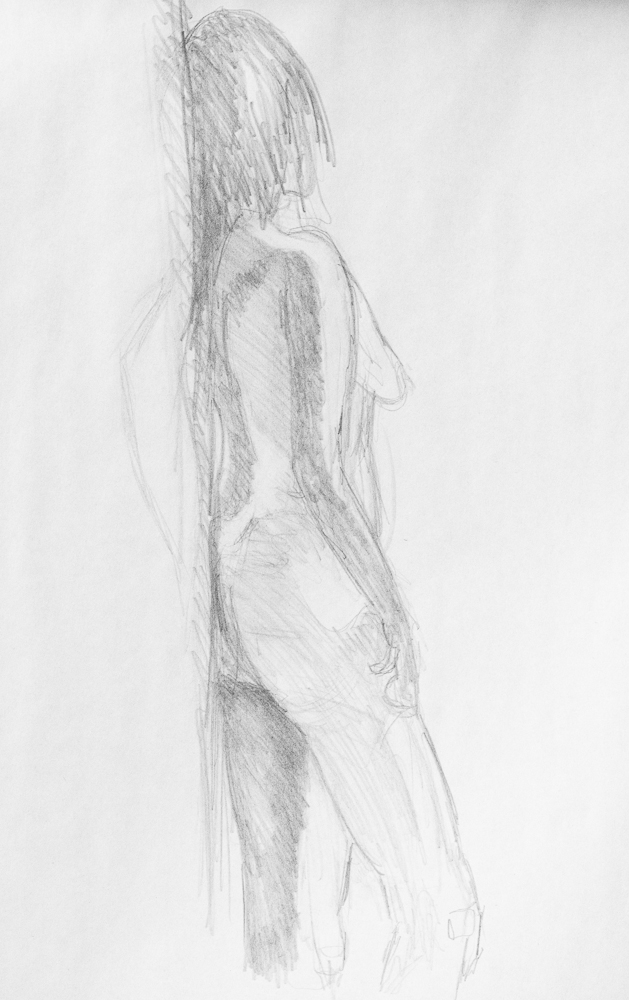

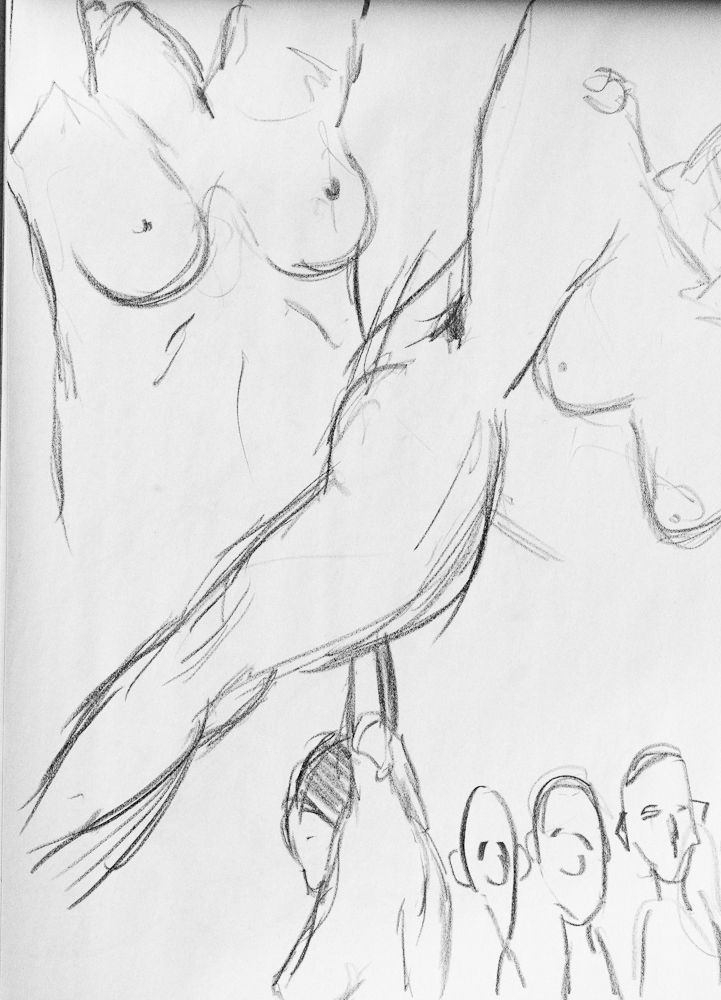

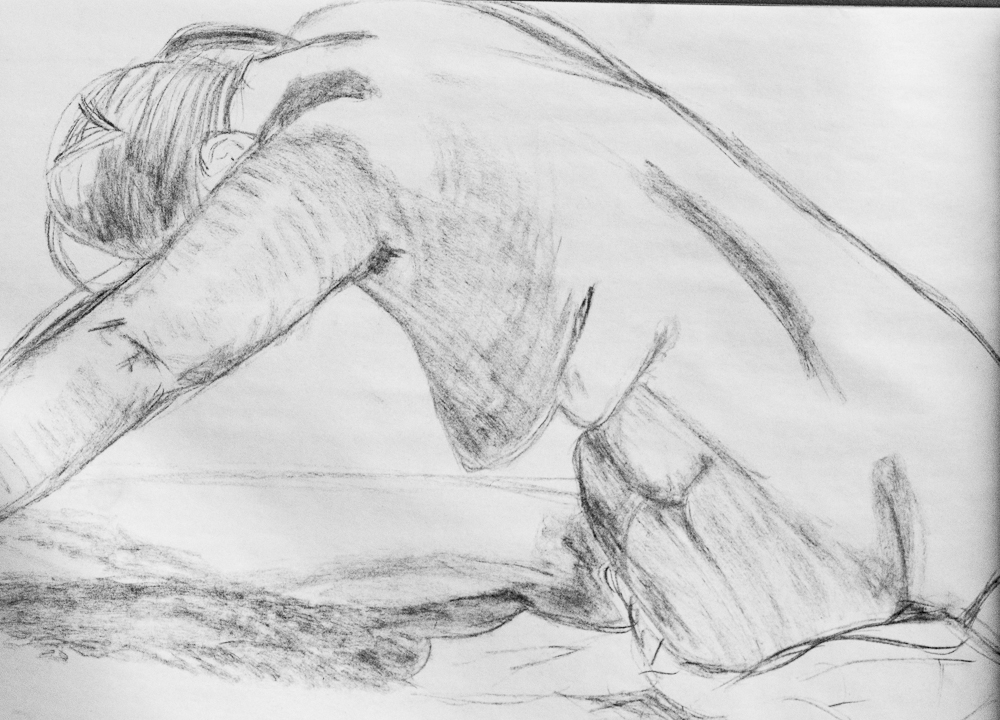


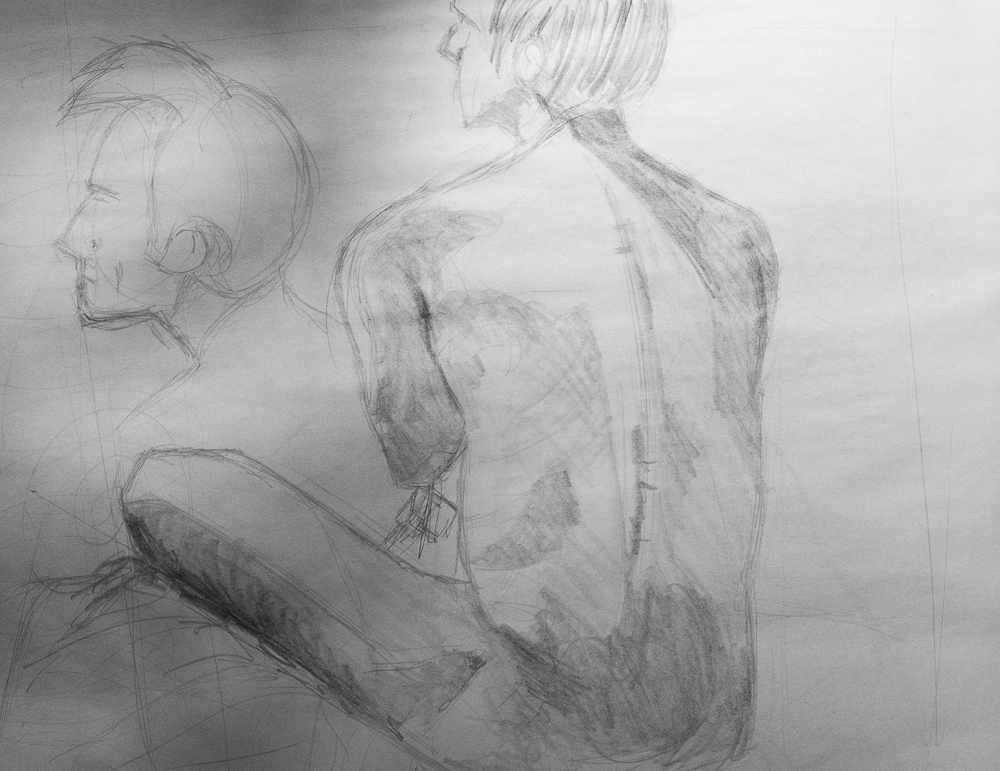
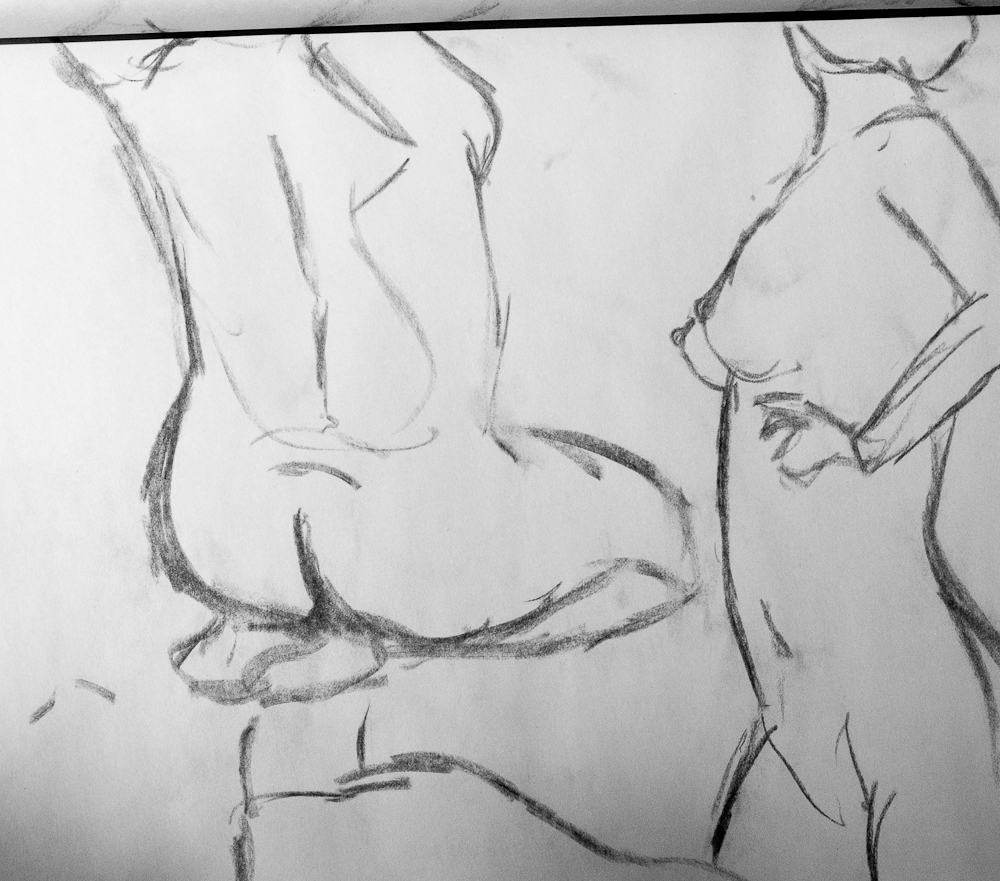
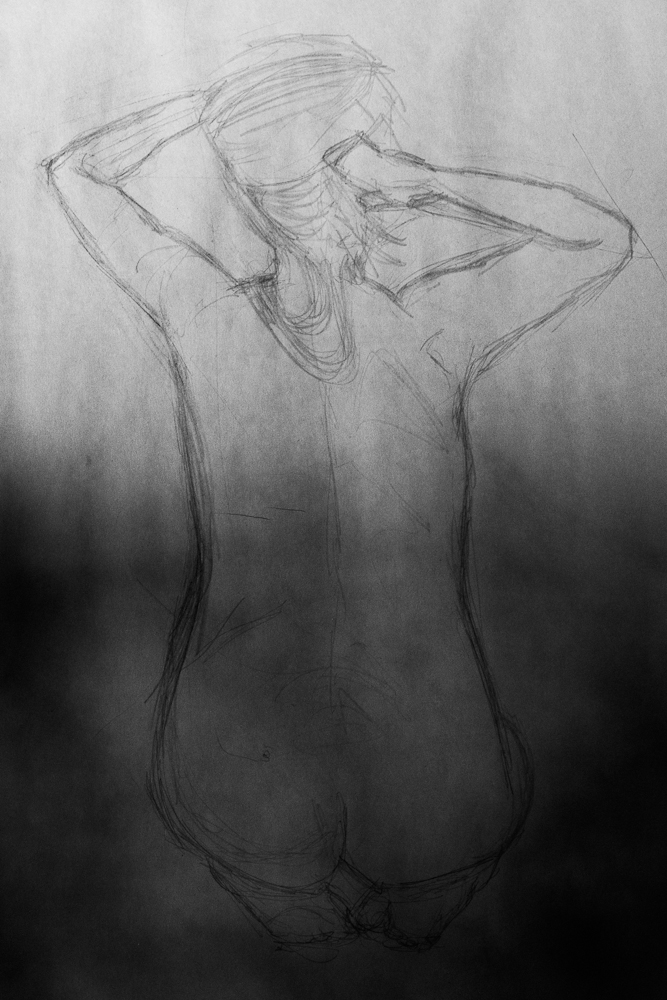


I’ve been attending a life-drawing studio in Sioux Falls over the last year,
below are a handful of sketches that came from these studios.
I came across a used macro lens for sale recently. I’ve had an eye out for a
macro for some time, but they are one of those specialty kinds of lenses that
don’t seem to be for sale used in the same bulk as consumer kit lenses or
ultra-zooms. Here’s the results of my first real test of the lens:
Settings
Model: Nikon D80 /w AF Micro-Nikon 200mm f/4.0 IF-ED
Shutter: 1.3 sec
Exposure Program: Manual
F-Stop: f/18
ISO: 400
Focal Length: 200mm
Lighting: None
And for those of you who would like to see it blown up to 100% we can really
see the details that macro photography allows:
Eureka! I’ve solved yet another odd puzzle of digital photography: easily
making your RAW file look like what you see on your Nikon’s LCD screen.
Perhaps you have just made the leap from shooting with JPEGs to shooting with
RAW. You’ve already read up on the various deficiencies of JPEGS: compression,
loss of color data, difficulty of editing and the many advantages of RAW:
ability to easily manipulate midtones, white balance and apply color filters in
post production. Happily, you start shooting in RAW but there is a problem. The
unprocessed photos lack the pop and vividness of your old JPEGs.
When you first open your RAW file in ACR or Lightroom there is a brief flicker
as your various in-camera settings (saturation, warmth filters, vividness) are
stripped away leaving you with a rather dull looking low-contrast image. This
is because your camera saves a small JPEG thumbnail to showcase on it’s LCD
monitor. This thumbnail contains all the post-processing features that your
camera does on JPEGs to make them pop for the novice user.
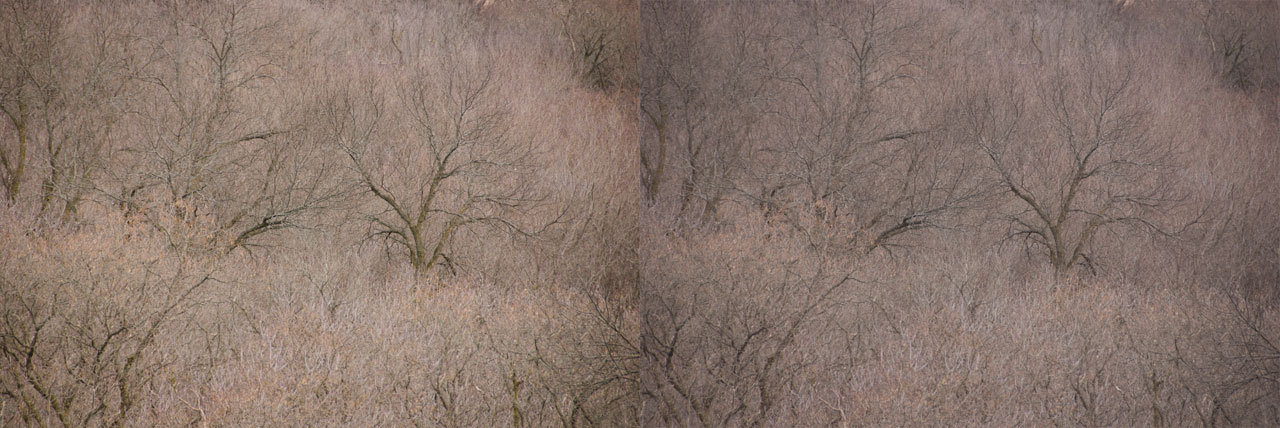
The color calibrated image is on the left while the Adobe Standard is on the
right. Note the added sharpness and warmth that calibration brings to the left
image.
I used to spend hours messing around with the sliders in Lightroom just trying
to recreate the same vivid colors that I saw on my camera’s LCD monitor and all
the while cursing Lightroom, Picasa, or Photoshop for gimping an otherwise
perfect shot. Only last week did I discover the easy, automated method in
Lightroom 3 to bring back the beauty camera’s in-house processing performs.
This method is camera calibration. Simply follow these steps:
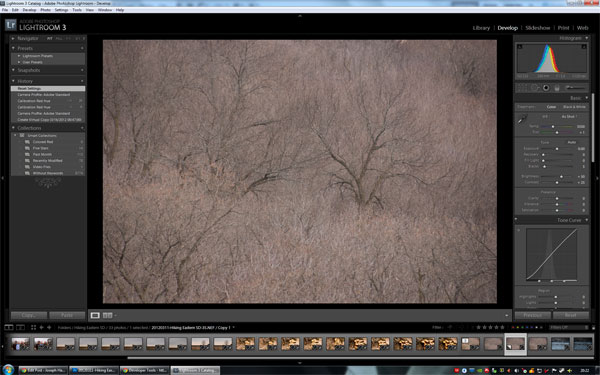
Open Lightroom 3 and select the photo you want to restore to your camera’s
settings.
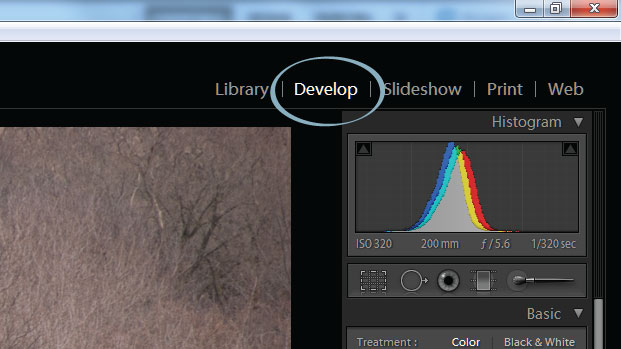 Click on the Develop
tab on the upper-right hand corner.
Click on the Develop
tab on the upper-right hand corner.
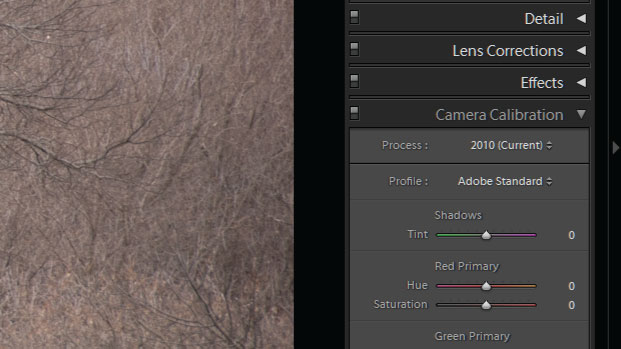 Below the histogram at
the very bottom of the right toolbar is the Camera Calibration toolset
Below the histogram at
the very bottom of the right toolbar is the Camera Calibration toolset
The Camera Calibration allows for manual adjustment of the Red, Green, and Blue
values of the image as well as the tinting of shadows. You will find something
odd about this tool, namely: adjusting sliders in the Camera Calibration tool
will not adjust the Hue/Saturation Sliders or Tone Curve of the image but
rather defines a new “starting point” for post processing the image.
While the sliders can be used to make adjustments, the easiest method is to use
the presets under the profile drop-down which for my camera (a Nikon d80) gives
the options of :
- List item
- ACR 4.4 and ACR 3.6 (this is Photoshop’s defaults)
- Adobe Standard (this is the ugly, bland default for lightroom)
- Camera D2X Mode 1, Mode 2, and Mode 3 (more on these below)
- Landscape
- Neutral
- Portrait
- Standard
- Vivid
The Adobe Standard which comes pre-selected for you also happens to be the
blandest of all the profile options. I suggest trying one of the Camera Modes,
one of which will most certainly closely match with the image your camera
displays on it’s LCD monitor. My favorite is Color Mode 3 for it’s warmth and
vividness when shooting nature shots, but it can be too warm and too vivid for
portraiture or indoor shots and so this gives a good opportunity for overriding
my camera settings to select Portrait or Camera Mode 1 on the
rare occasions that I am shooting an event. The Vivid profile is also fairly
interesting, but I would suggest using it on a case-by-case basis since it
seems to blow-out already bright photos.
There was an article on Reddit this week encouraging folks to list this early
photography blunders. A common one was the “cover every mm” mistakes – where
you try to get zoom lens that cover the entire range of focal length
possibilities. I know this mistake fairly well, I made it myself.
I started SLR photography in 2008 when, anticipating a Europe trip, I decided
to dump my point-and-shoot camera for a Nikon D80. As with any important
purchase, I researched the topic to death and often came upon Ken
Rockwell’s site.
Here’s the thing. Ken Rockwell is a master of SEO. He will show up on pretty
much any photo-related Google search. I think he has some excellent starting
advice if you are interested in getting the best vacation and family photos out
of your camera. However, I think that his reviews are rather subjective and
lack the more thorough and systematic reviews that you would find on
PhotoZone (a site, I sadly discovered after my
camera purchase) and I do not think his is advice is geared towards someone
pursuing photography as a fine art or career.
The $600 Mistake
Being new to SLR photography, I fell into thinking I would need to cover the
full range of focal lengths, and I didn’t care for carrying around the kit
18-55mm and 70-300mm lenses that were often sold with cameras. So I started
looking at the 18-200mm lens, which today retails
for $950.
I assumed with such a hefty price-tag, this lens would be an upper tiered zoom
lens and at the time folks (such as Rockwell) were raving about how it had
replaced their need for all but exotic lenses.
The truth is, the lens is soft, distorted and never took a shot better than my
little point-and-shoot. As soon as I got home from my trip, I bought a prime
normal lens and rarely ever put the 18-200mm on my camera again.
This learning experience was not all bad. I did get one thing out of the
18-200mm: I learned that I do not need to cover all the focal lengths. Indeed,
I really only need three different prime lenses to cover my shooting needs.
You see, when I got back from Europe I looked through my photos and discovered
an interesting pattern. I shot all my landscapes at 18-24mm, I shot everything
indoors or medium-ranged at 50mm, and I shot all my telephoto shots at 200mm.
Three distinct groups. I really did not need the ranges of 25-49mm and 51-199mm
at all.
Today, I’m moving all of my lenses over to three lenses: Nikkor 35mm DX f/2.8
(or Nikkor 50mm f/1.4 when I get an FX body), Nikkor Micro 200mm f/4, and the
Nikkor 12-24mm f/2.8. Three lenses at a much higher cost and covering a much
smaller range of focal lengths, but worth it because they will take better
shots than the 18-200mm ever did.
There’s Still Some Use for a Super Zoom
So my advice to new photographers? I would recommend that you buy prime lenses
or if it must be zoom – keep the range of the zoom relatively small. As for
the 18-200mm beast? It does serve a purpose. I would suggest renting it for a
week. Take it on vacation or somewhere that you will likely make a lot of
shots. When you get back graph out your most common focal lengths. A pattern
will arise showing what you really need to cover.
Happy shooting.
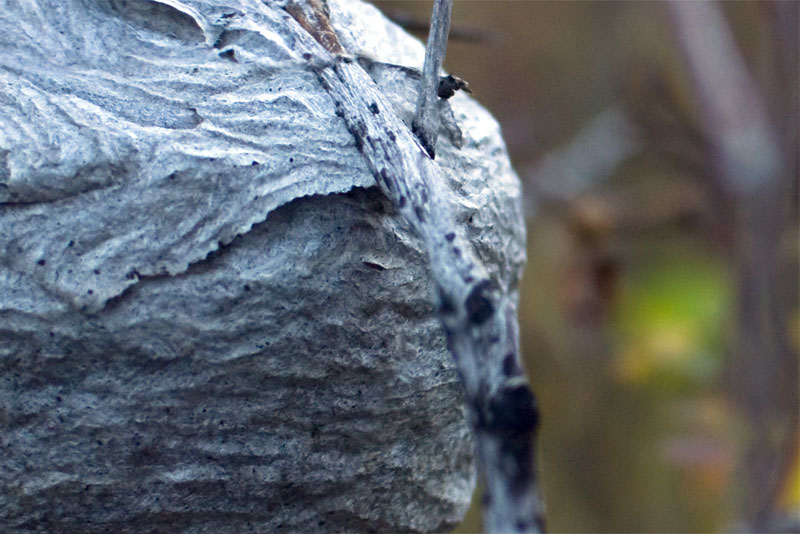
I spent two goods nights last month working through a series of photographs
that I intended for Christmas gifts. Perhaps one of the most challenging
post-production works was this photograph I took of a hive in Gallatin National
Forest just south of Livingston, MT.
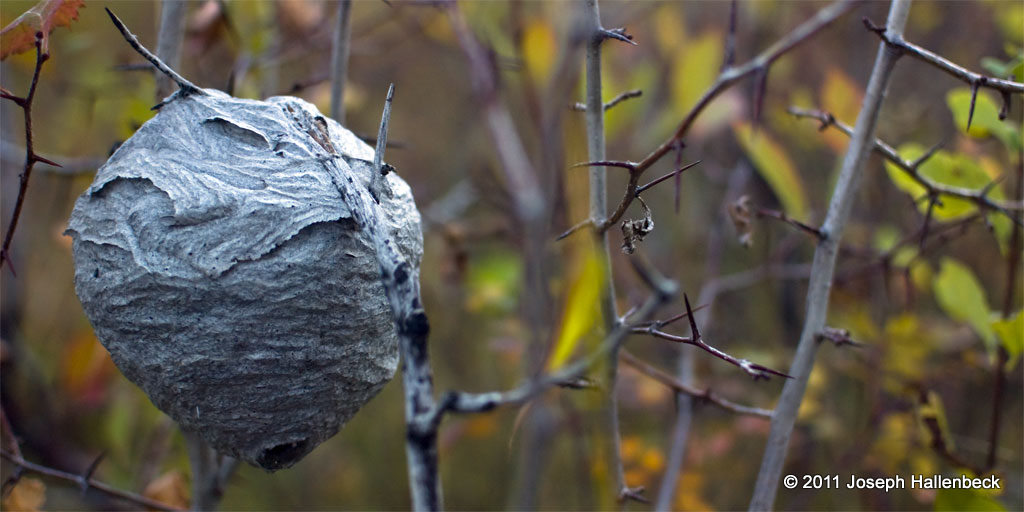
This shot is actually a composite of two different shots. You see, I took
nearly a dozen photographs of this hive free-hand during sunset. There was
little light and in only a small handful of shots was the hive sharp. The
composition for the piece was also a challenge. A number of shots have twigs in
distracting locations drawing the eye into the background. Yet, if the hive is
centered, it becomes to dominate. The hive had to sit at a roughly 1/3rd mark
to really bring out the shot, but this only occurred perfectly in one shot
which was not sharp. The solution? I combined two different shots. One, for the
composition and background and a second for the subject matter. The image below
shows the two originals side by side. The left shot I used for the composition,
but I edited the hive from the right shot on top of the left shot.
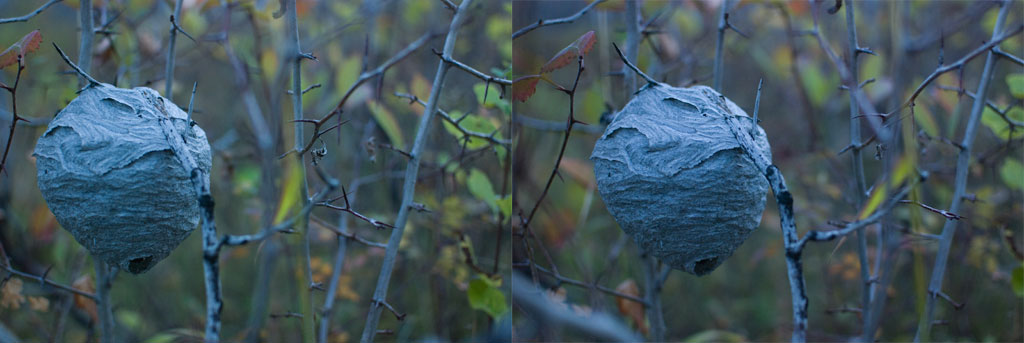
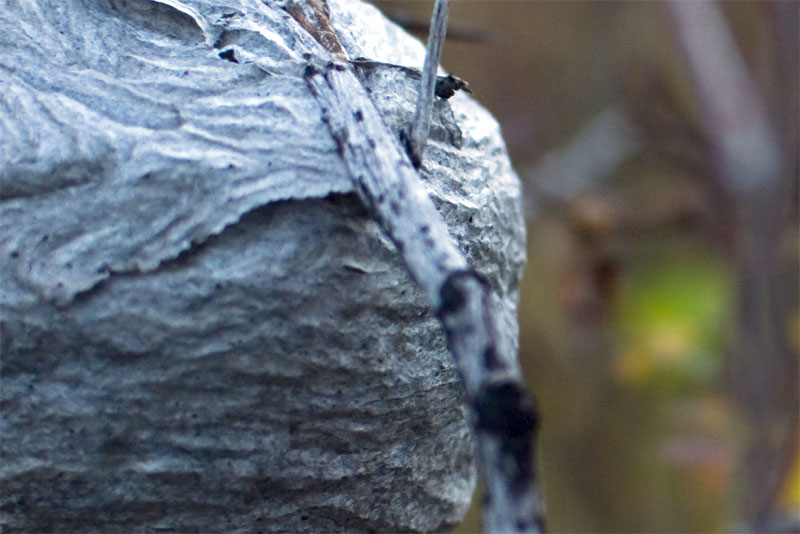
I used Photoshop to get this effect. First, I opened both images in the raw
editor and worked the settings until they had matching histographs. I overlayed
the new image on top of the final background composition and masked out the
parts of the image that I did not want to use until I had a layer that looks
like the shot below:

When I zoom to 100% you can easily see the benefits of combining the two shots.
Note how the final work on the left is crisp, while the old hive on the right
is blurred:
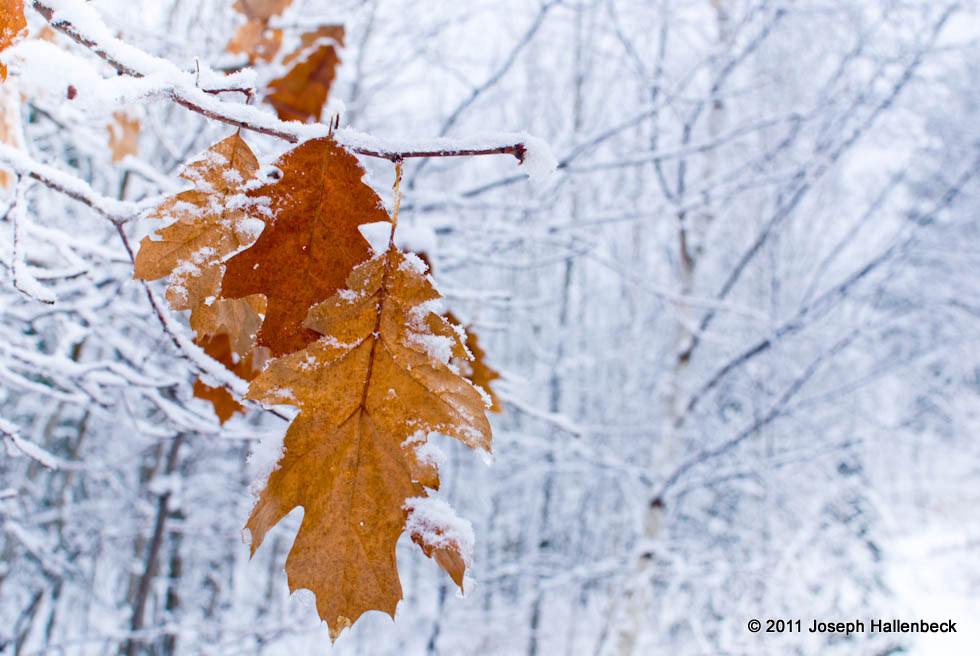
It’s about time that winter got to these parts. This last week saw about 6” of
snowfall over the weekend and a couple extra inches through the week.
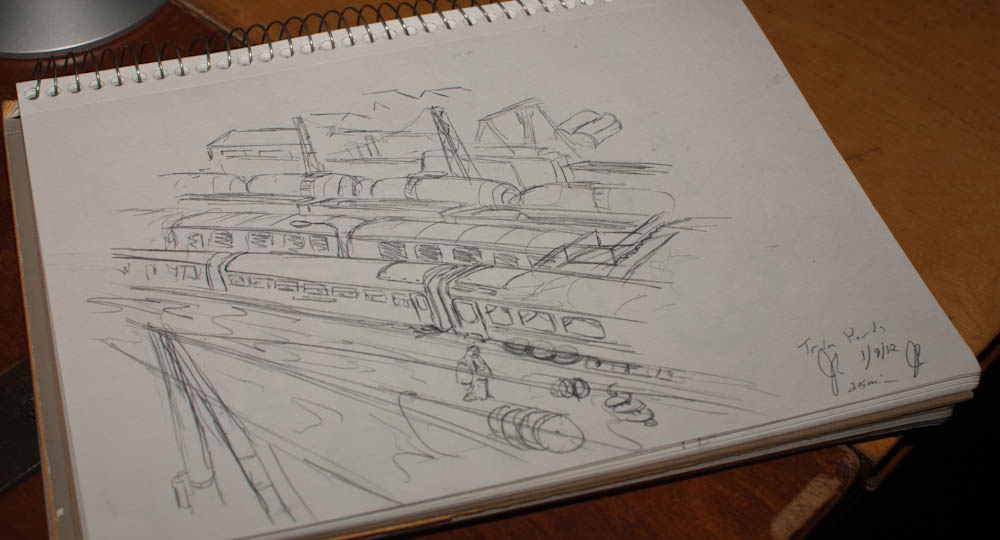
My first sketch this week was an attempt at a train locomotive. This sketch did
not turn out very well. I erased it, and started over with a more general
sketch of a train yard that I found.
A second sketch was done while my girlfriend worked on the computer. Sitting
across from her, I sketched her hand over the mouse. Both of these sketches I
did with a 0.5mm drafting pencil with standard softness lead (around HB). This
is softer than I am typically used to working with, but I find that the lines
are more expressive when sketching quickly and I enjoy the effect when not
working on a more precise drawing.
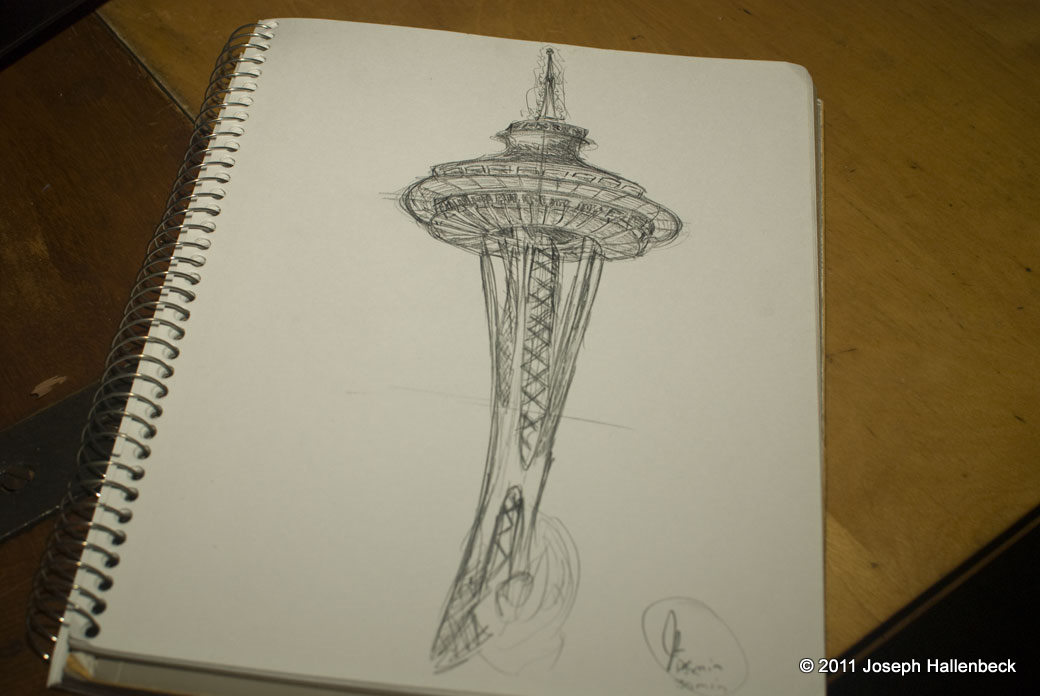
This week’s pick from my random sketching – an attempt at sketching Seattle’s
famous Space Needle.
For Christmas this year I sketched Calvin & Hobbes themed gift tags using Calvin’s many snowmen as an inspiration.

I discovered the Daily Sketch Reddit
this week and have added thirty minutes of sketching off their prompts to my
daily routine. One of the nicer sketches this week was that of
Krampus the mythical christmas demon of
central Europe.

I started working through my library of photographs lately in order to sort out
(through hundreds) the chaff from the wheat and begin trying my hands at
post-production. I typically stick with a rather traditional methodology. I
make adjustments to the raw file, but stick away from more elaborate
composition effects.
Settings:
Model: Nikon D80
Shutter: 1/10 sec
Exposure Program: Automatic
F-Stop: f/5.7
ISO: 100
Focal Length: 170mm
Lighting: None
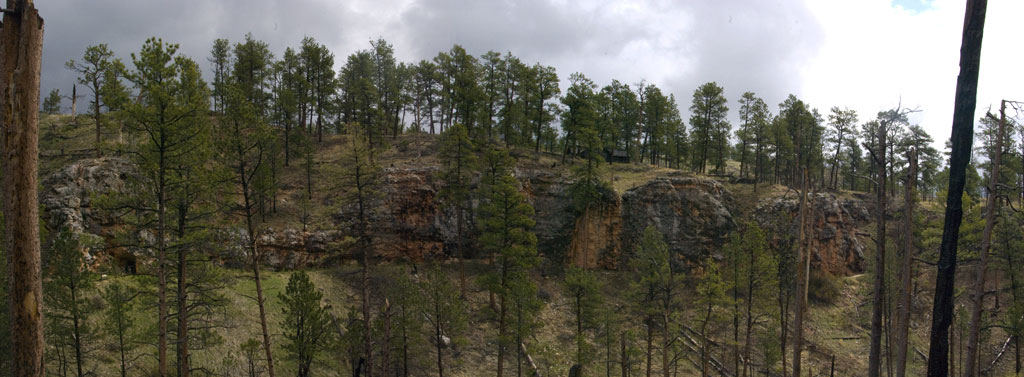
Continuing my summer photography, I present a series of photographs taken while
roaming the trails at Jewel Cave National Monument. These are but a small
fraction of the wildflowers that grow through the summer season in the Black
Hills of South Dakota.
Settings:
Model: Nikon D80
Shutter: 1/1000 sec
Exposure Program: Aperture Priority
F-Stop: f/2.5
ISO: 100 Focal Length: 35mm
Lighting: None
Settings:
Model: Nikon D80
Shutter: 1/60 sec
Exposure Program: Aperture Priority
F-Stop: f/8
ISO: 100
Focal Length: 35mm
Lighting: None
Settings:
Model: Nikon D80
Shutter: 1/320 sec
Exposure Program: Aperture Priority
F-Stop: f/1.8
ISO: 100
Focal Length: 35mm
Lighting: None
I have a long backlog of photographs from this past summer that I am beginning
to work my way through and will be showcasing the best of over the next few
weeks. I have a goal of attempting a showing of my photography in the Sioux
Falls area sometime in the next nine months. I have had friends over the years
doing showings at places like Black Sheep
Coffee as well as at my alma matre,
Augustana
College
and I hope to select a few prints to really work through in photoshop,
professionally print, matte, frame, and display. The above photograph is a
bouquet of wildflowers that I gathered along the Hell Canyon
Trail
in South Dakota for my girlfriend. This shot is taken indoors with on-camera
flash at night. The flash readily illuminated the bright blue tones of the
flowers while giving the room a nice black backdrop.
Settings:
Model: Nikon D80
Shutter: 1/60 sec
Exposure Program: Aperture Priority
F-Stop: f/8
ISO: 100
Focal Length: 35mm
Lighting: On-camera flash, auto-mode
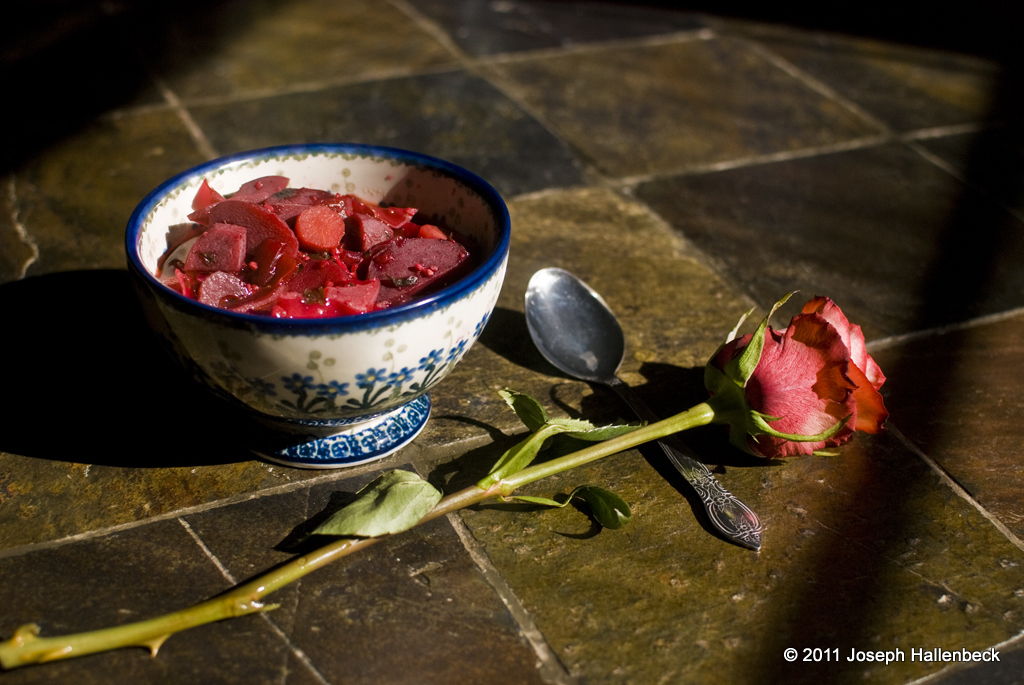
I am a rather shy person when it comes to photographing people I don’t know.
Food, provides a good substitute. Particularly since food can be positioned and
set out to take advantage of both artificial and natural light. The above
photograph was taken at noon using natural light filtering in through my dining
room window. The arrangement takes advantage of the strong diagonals created by
the stone table and the red rose mirrors the tones of the hearty bowl of
Russian borscht that I had prepared some weeks prior.
Settings
Model: Nikon D80
Shutter: 1/500 sec
Exposure Program: Aperture Priority
F-Stop: f/3.2
ISO: 200
Focal Length: 35mm
Lighting: Natural Light
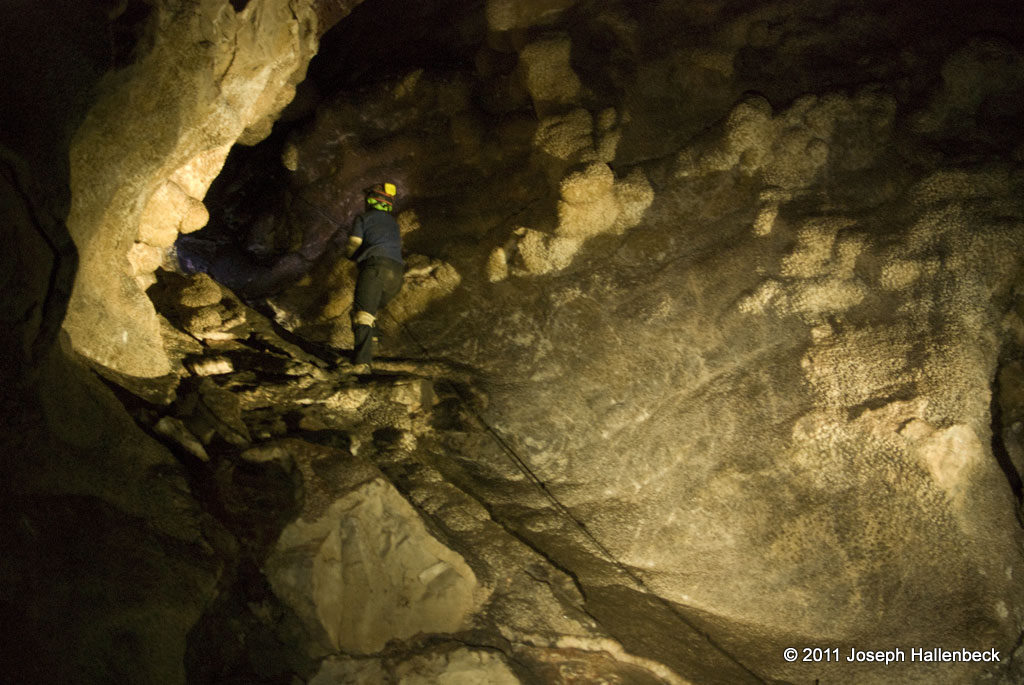
I again returned to Jewel Cave’s Wild Caving Route with my camera to take
photographs of the route. I find that the NPS Library for the route is rather
sparse requiring our brochures to consist of photographs of visitors during
tours rather than set photographs designed to illustrate the challenges of the
route itself.
To get the equipment into the route is no easy challenge. The pelican cases are
bulky and heavy. The plastic tends to cut into my side, throw me off balance,
and generally turn an easy trail into a nightmarish pain. In order to minimize
the time needed to carry the equipment, I opted for a shortcut. I traveled
backwards on the route to a chimney (the “diving board”) that dropped down near
the rope assist. I lowered the equipment down on rope then after the shoot
climbed the chimney and deposited the camera at the end of the route.
The shots were taken as a rapid-fire mode since the exposure time at 1/10 on my
35mm prime lens at f/1.8 meant that quite a few came in blurry. The cave was
lit using spare caving lights rather than flashguns due to the flashguns
overpowering the shadows in the room. I shot some 48 shots over the extend of
two climbs with only a handful of the shots coming out.
Wow! Over a month since my last post. Time as a Park Ranger get’s away from me
during the summer. I want to be underground in the cave, above ground on the
trails – everywhere with a camera and back at the apartment working on my art.
This last week I worked on sketching from screen captures of various music
videos. The one selected for the blog is a sketch from Lady Gaga’s “Bad
Romance.” Now, I must say that Gaga is not really my typical fair (I’d more of
a Progressive/Post Rock fan with a long playlist of Yes, Coheed & Cambria, or
Godspeed You Black Emperor!). Nevertheless, the directorial work in Gaga’s
videos is astonishing and I’m blown away by the aesthetic detail and complex
imagery conveyed through the likes of Gaga/Klein’s Alejandro, Gaga/Francis
Lawrence’s Bad Romance, and Gaga’s Judas – I must commend the music videos
for taking it quite a few steps beyond the normal fair and more over for their
creepy design that’s remeniscint of Guillerno del
Toro’s monster designs in
*Pan’s Labyrinth *.
In some other semi-related news to my sketches, I’ve begun work on
storyboarding a comic book adaptation of The Saga of the Volgsungs which will
be my next work now that the first chapter in Ivan at the End of the World is
coming to a close. I decided that I needed to work on my plotting and what
better way to do then to steal a page from the bard and go rooting through old
myths with established track records.
When I started the process of storyboarding Volgsungs I was imagining myself
keeping the artwork rather similar to it’s Norse origins. However, as I began
my music video sketches, I began to imagine the work taking a much darker
“cyberpunk” feel – an adaptation that would set the work in a much more
futuristic fascist state. The project is rather exciting to me, yet will be a
long time in coming with all my other (see above!) summer side interests.
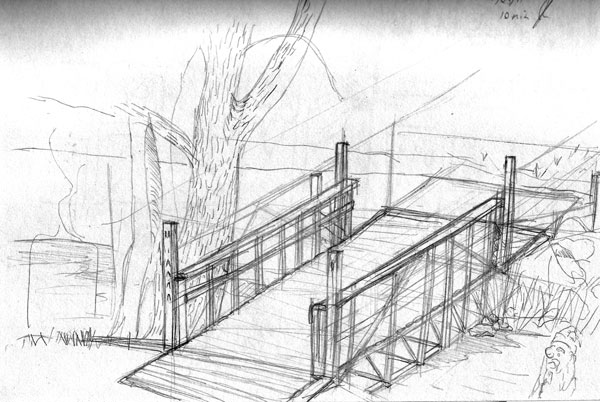
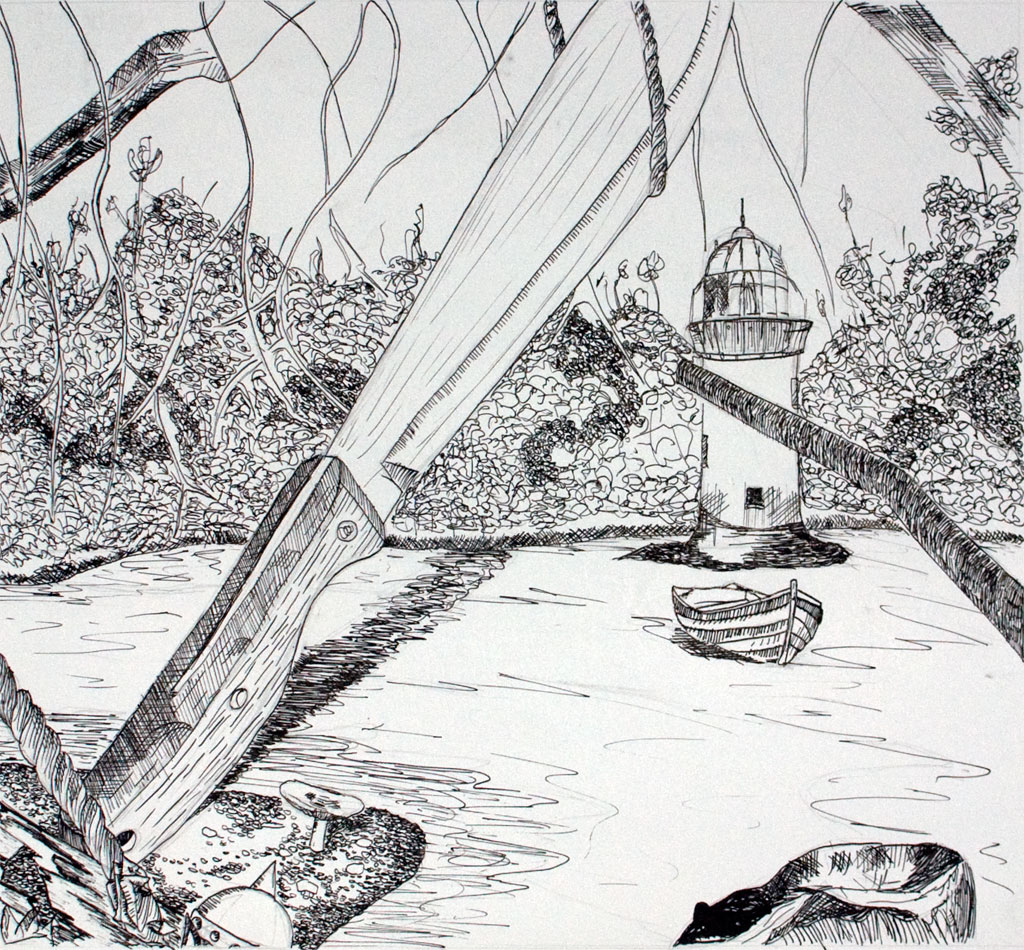
Not the best sketch ever, but I had to get something up for the week. Work on
the comic continues to dominate my time, so I had only a few minutes in the
week to work on any kind of sketching. This one is a quick draft of a canal
bridge based off a photograph taken in southern Michigan.
I am back from a long break from web-posting due to settling back into the
day-to-day routine of being a Park Ranger. The job takes a lot out of me, and I
find little time in the evenings to work on projects. Yet, after four years of
this, I think I have found how to take this job in stride. After a grueling day
running around a cave, talking endlessly to visitors, and editing brochures –
I get home and immediately shift gears to drawing, writing, and editing.
Nevertheless, there is never enough time to get to everything, hence the
drought of updates.
One task I was assigned last week was to photograph the cave’s natural entrance
for a future exhibit. The sculptor for this exhibit needed example shots of the
cave entrance so I was sent into the field with my camera and tripod to get
shots of the entrance. My new tripod (a Manfrotto 055XPROB with a 229 Pro Head)
works great for doing composition shots. The above is actually four separate
shots taken with a telephoto lens (200mm) from the opposite canyon wall then
edited together in photoshop. The tripod was precise enough to keep a level
plane between shots making the editing procedure a piece of cake.

Here’s Cpt. Howell and Sam, the “villians” of my short-lived “Dreamscapes”
webcomic.
I’ll be moving back to South Dakota over this week so I’m pre-posting comics
for the next two weeks and hoping that they will all go live at the appropriate
times. Thursdays will be filler-art days for the next two weeks due to the move
as well.
This week’s filler is a character sheet where I was trying out different
expressions for Ivan while trying to see how accurately I could redraw the
shape of his head. I’m still not satisfied with the character of Ivan both as a
character as well as his overall design. He might suffer a fate common to Mark
Twain’s unloved characters and fall down a well.
I realized yesterday that the “Writing” link on the portfolio was broken. A
quick fix for all those fans who want to continue reading my Kierkegaard
thesis.
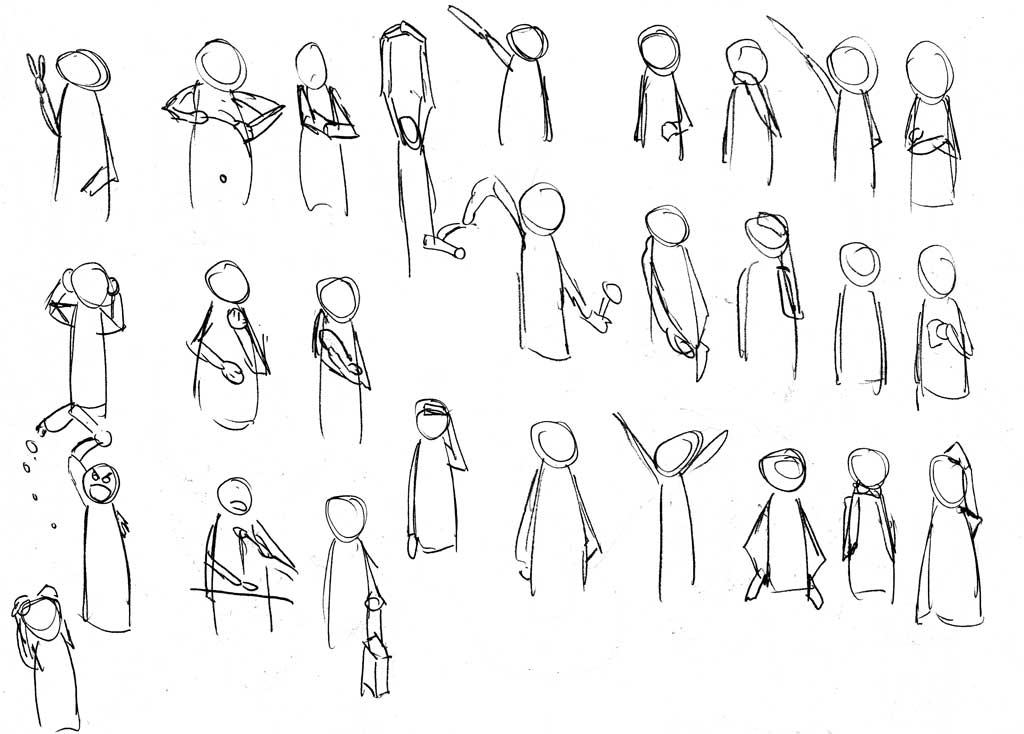
This week’s sketch journal is a little late due to the Easter holiday. I
traveled south to Indiana to visit relatives over the weekend (but mostly to
play fetch with their dogs, I do miss having a good lab to play fetch with). I
promised myself to spend a great deal of time sketching on the trip, but alas
promises soon fade. One item I did work on was gestures for comic book
characters. I find that I have a very limited range of gestures in my current
work, so I set out to draw as many different gestures as I could think up.
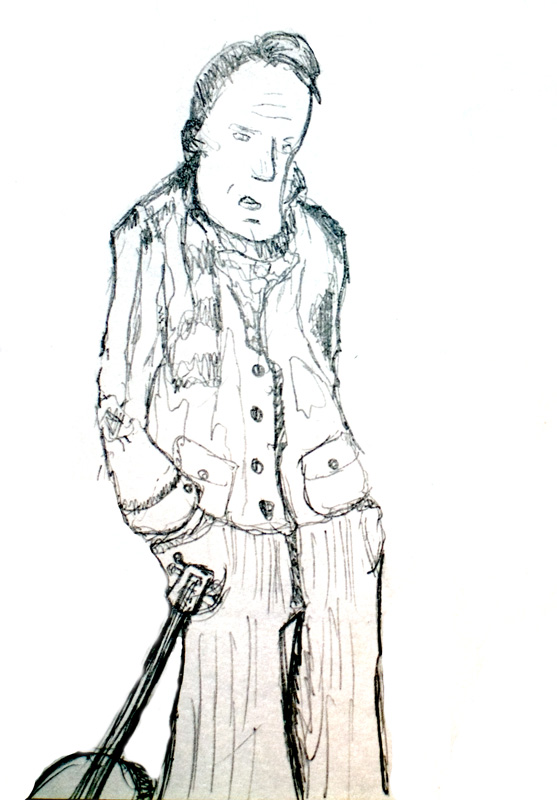
I’ve been very busy working on the script and sketches for my
webcomic this week, so I had very little time to extra
sketching on the side. So here’s a graphite scribble composing a couple
different people I know into a single caricature.
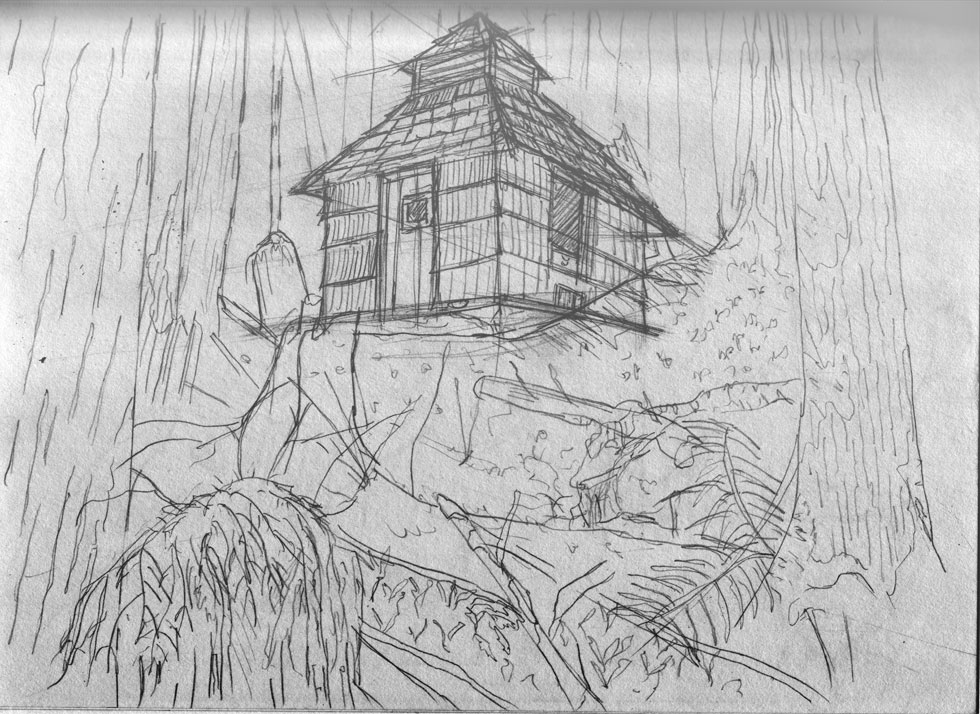
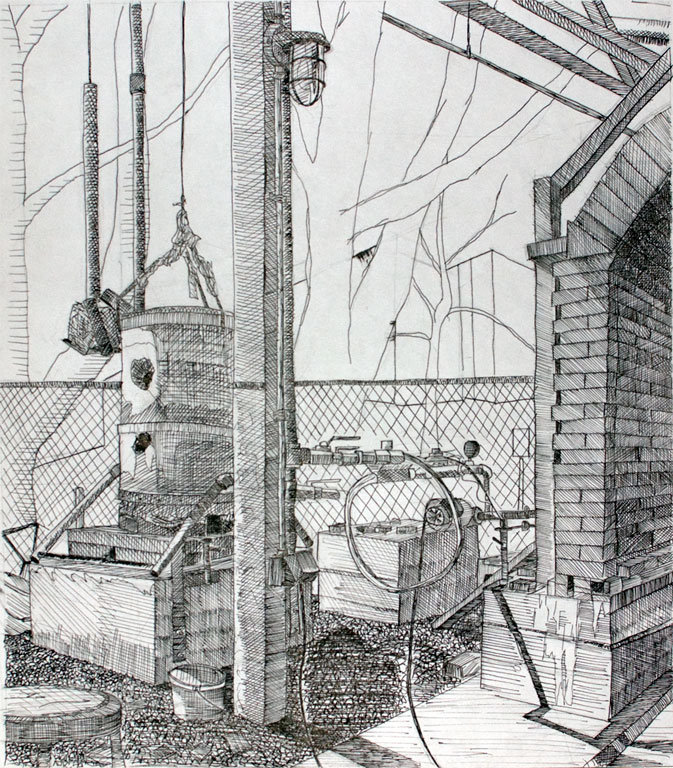
My second week of sketching focused on perspective using a rustic-era shed that
I photographed in Olympic National Park. The sketch is primarily contour lines,
but I hope to ink and shade it later this week which will improve upon its
present “rough” look.
Because of it’s 30% extra brightness, the full moon of March, 2011 was dubbed
the “Super Moon.” This was some night photography I couldn’t pass up! This
composite shot was taken from the shadow of Stonington Peninsula’s lighthouse
looking eastward over Lake Michigan. The moon rose promptly at 8:15 as a bright
orange ball and climbed over the lake. I took each of roughly thirty shots from
my tripod, but a strong wind and cold ruined many of the takes.
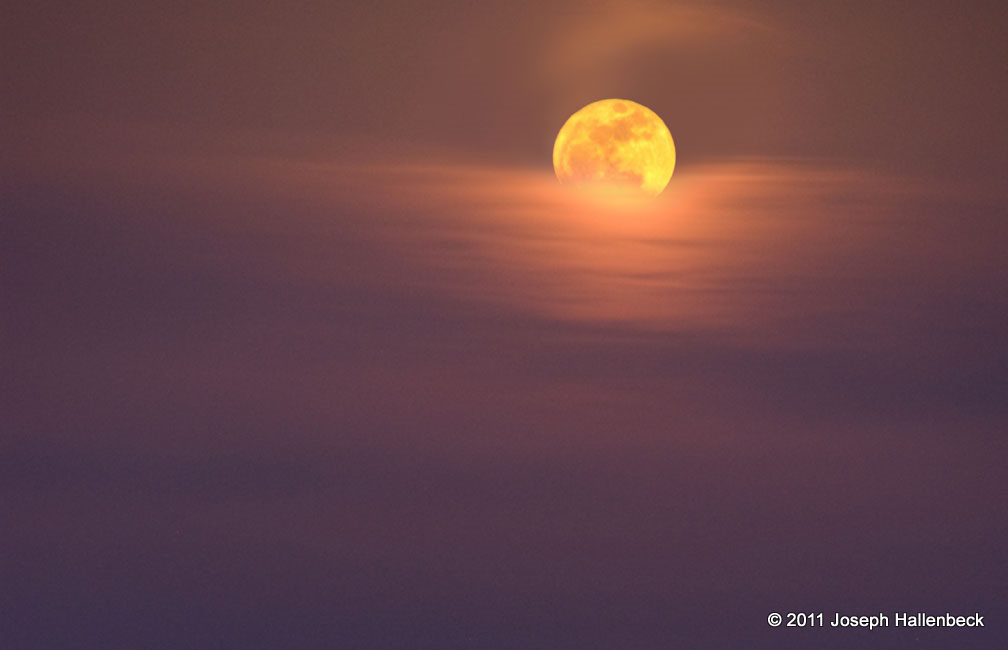
The final result is a composition of two shots at different apertures. The
first shot is adjusted to capture the clouds and details of the night sky, but
this leaves the moon as bright as the sun. The second shot, taken from the
exact same position but with a smaller aperture, captures the fine details of
the moon’s craters. I edited the moon out of the first shot and replaced it
with the detailed moon of the second shot to capture an appearance that
accurately reflects the experience of seeing the Super Moon.
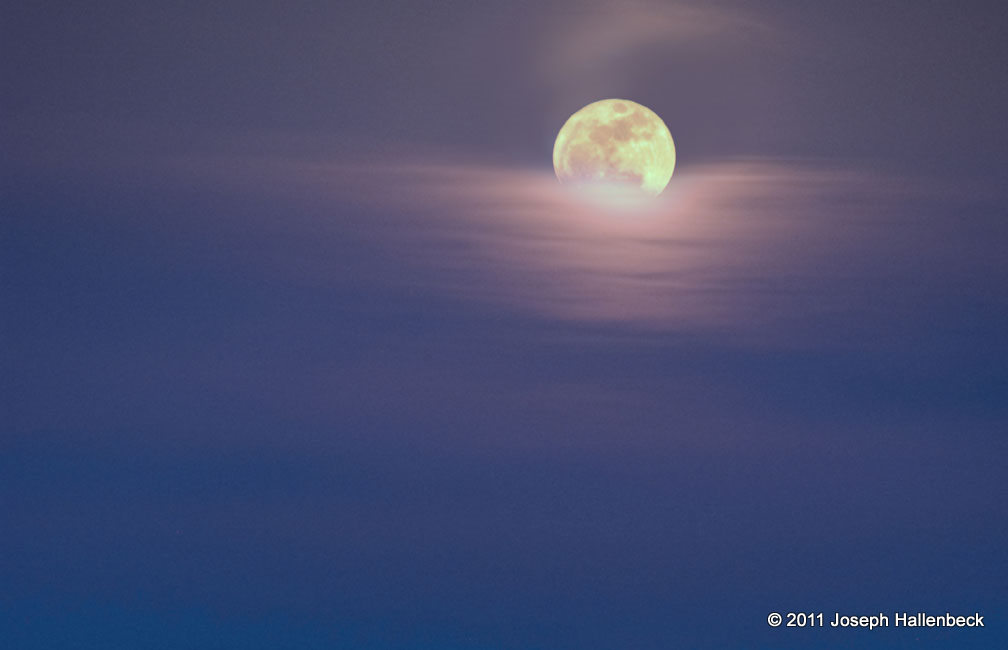
A second difficulty is the colors. Taken with long exposure times, the moon
comes out bright orange. Yet, we associate the moon with whiteness (rather than
bright red like a sunset). If we want the moon to look closer to how we
associate it, we must apply a cooling filter to the image to adjust out the red
tones and replace them with the blue tones we normally associate with the moon.
The result is the picture to our right.
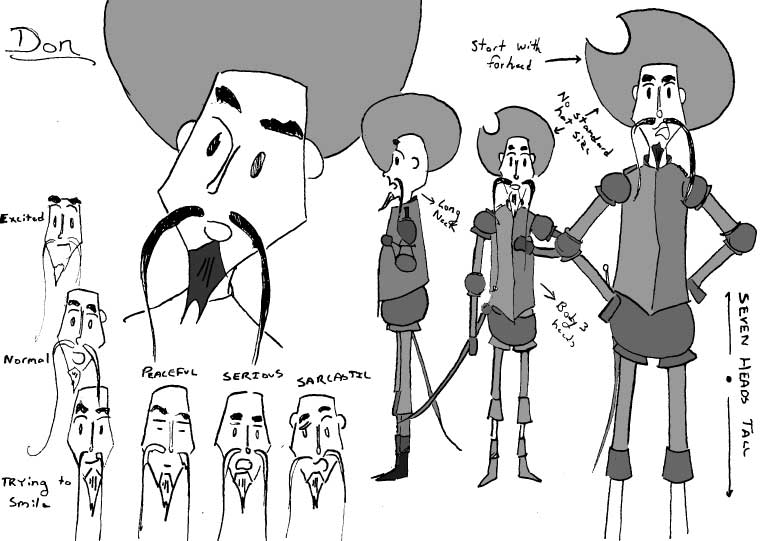
The process of working on the comic continues and today I present my draft
sheet for the character of Don.
I tried on this sheet to experiment a little with his design. For one, out of
all the character’s Don was the most complete out-of-the-box. He is based on a
statue of Don Quixote that my drawing professor at Augustana had us draw.
Indeed, many of these characters are based on weird statues he had us draw.
Thus, when it came time to draw his character sheet, I decided to experiment. I
colored in his mustache, removed the bandeliers and tried for a more realistic
shape to his breastplate. In the end, I think I liked him just the way he was.
A second bit of experimentation comes in the inking. Previously, I inked with
brushes, but I decided that I ought to be more discerning with them. For
example, Tamar Curry’s Lumia’s Kingdom (whose
artwork I admire) tutorials show him inking with dip pens. I love dip pens for
my scenery look, but kept to brushes for characters and organics even though I
find brushes much more difficult to use. On this sheet, I went with dip pens
throughout, and the result? The lines look less confident on the larger images
and far too uniform. Yet, in Ivan’s character sheet (coming up next!) I
discovered that the brushes really do work – I just need to double or triple
the size of my character drawings. Pens work well for the fine details of the
backgrounds and smaller depictions of the characters (less than 1” tall heads),
but once I get into having 2” - 3” tall heads, the brushes look much more
graceful and overall 9” tall characters seem to be easier overall to draw.
A friend of mine (Alex Stommes) started keeping a
sketch journal last summer. His plan was to post a sketch every day to the
journal. The idea of this process was that it would encourage an active
involvement in the art and a deadline to produce something each day. I found
the idea intriguing and the results quite superb. By the end of the summer he
improved immensely, and he continues to post new material regularly.
I wanted to start my own journal, but with my all my ongoing projects keeping a
daily journal would require far more commitment than I could muster.
Nonetheless, I still want to try, so I’m starting a weekly sketch journal.
Every Friday, I will post something that I’m working on and hopefully this will
encourage me to draw something each week (even if it’s just furiously
scribbling at 11:30 PM on Friday night).
I returned to drawing in my final year of college following a half-decade
hiatus. Akin to my photographic work, I tend to focus on space and atmosphere.
The interconnections of parts forming into textures, brisk ink lines and sharp
architectural shapes with muted or monochromatic colors fascinate me.
In recent years, I have taken to community figure drawing sessions to enhance my
skills outside of still life. I aspire towards integrating illustration, and
particular sequential art into my narrative storytelling.


After five years of hauling it through caving expeditions, European bicycling
trips and countless backpacking expeditions, my Nikon d80 seems a nigh
indestructible tool.
My photographic work, a hobby I picked up during a college trip abroad, focuses
principally on nature and those spaces that I think capture the revelation of
the the sublime in a particular space.
As such, I tend to work mostly with natural lighting using prime lenses to
compose my observations.
My photographs have been featured in a number of National Park Service
publications related to Jewel Cave National Monument and in advertisements
promoting the Black Hills of South Dakota.
Below, I have selected a small collection of some of my favorite shots from the
last few years.


If you actually read my blog entries you might begin to notice a very nice
pattern to them. It begins “I promise to start updating!” Soon after making
such a promise, I look at the comics to come and realize that they suck. I drag
my feet on releasing them. I dabble with just starting over. I draw some
character sketches. I “practice” my inking. So very many excuses, and
fortunately, so very few readers to complain!
My excuse this time? I am working on the script and the background. When I
began to write up the background, I found myself really getting into it.
Suddenly characters had purpose, the world had a map, and the plot flowed out.
However, I noticed some problems. First, much of what I wanted to do with the
characters ran contradictory to what the comic already established. If I
continued posting the present line of comics unedited, I would only push myself
further from my plans.
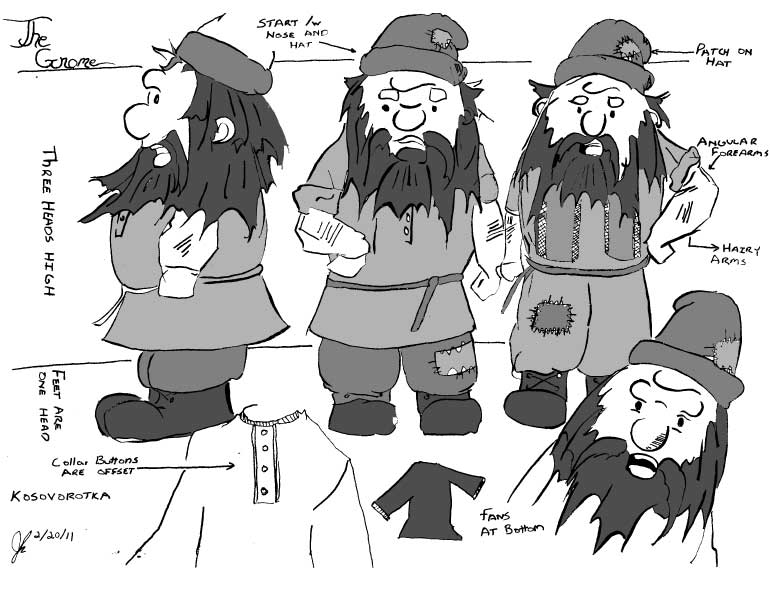
Instead, you get more filler art and this week’s entry is the Gnome.
Who is the Gnome? Well he is a gnome of course! In appearance, he is a short,
angry little earth spirit who was quite fed up with the big people of the world
bumbling into his affairs. Already, the comic establishes that his manners are
rather lacking and he is fond of arguing.
The Gnome was the first character whose design came together. I started with a
big circle for the nose, then the rim of the hat above, then drew tuffs of hair
sticking out from beneath, forming a circle around his face. The Gnome’s body
extends out from the edges of the beard to make a barrel shape. His cloths are
rather traditional. Whenever I imagine Gnomes or Dwarves in their casual wear
it’s always in the form of big boots, baggy trousers, and a tunic of some sort.
In the case of this dwarf his tunic is a
kosovorotka, a traditional Russian
shirt known for its skewed collar. Out of everyone, the Dwarf has been at the
End of the World the longest, and so his clothing is ragged and patched from
many years of use.
 Continuing the series of character sheets from the past two days. . .
Today, let’s look at the 1200DPI scan of the character sheet. The
higher-resolution scan resulted in a 75MB TIFF image that crawled even my
design rig to a halt. I put the 1200DPI scan through the same process as the
300DPI scan, but this time I found a surprising change when it came time for
live-tracing. The Illustrator traced the image correctly without my fiddling
with the threshold! I still had the nice smoothing effect that live trace gave
to my inks, but with the higher resolution it kept the finer details of the
faces and smaller arcs. It also enclosed more of the spaces making the live
paint process a much smoother operation that required only a minimum amount of
readjusting the automated gap finding.
So my conclusion? Scan big!
I continue the parade of character sheets from yesterday.
Recall that I mentioned scanning the sheet at both 300DPI and 1200DPI, the
result of the lower-resolution scan is what we will examine today. After
scanning the sketch, I opened Photoshop and adjusted the levels (Image >
Adjustments > Levels or Image > Adjustments > Curves) to give the inked lines a
rich black look. Then I placed the image into illustrator and set the program
to live trace. The benefit of live trace is two fold. Illustrator inks much
better than I. The results smooth out many of the “shaky hand” errors, closes
up gaps, and gives the image a much more unified tone. It also allows live
paint, which turns coloring the work into a paint-by-numbers process of picking
a swatch color and then clicking to fill the spaces inside the contour lines –
much less time consuming than shading with ink washes.
Three problems immediately became apparent.
First, fine details such as the faces disappeared. This required a good deal of
fine tuning of live trace’s “threshold” option. If I pushed the threshold too
high the thicker lines became massive black smudges that lost much of their
details, but if I dropped the threshold too low smaller lines disappeared. The
result was a balance of the two extremes that failed to adequately capture the
details of the original inking.
Second, live trace smoothed over much of the finer line arcs. This is
most noticeable on the two center characters. The profile version loses the arc
that defined her upper lip, creating what looks like a single curve from the
tip of the nose to the chin rather than two smaller arcs. The face of the
forward character loses definition in her shape. The original image showed the
left-side of her face having much sharper angles.
Third, and this became evident only once I began live painting. The loss of
finer details meant that many of the lines no longer connected to create
enclosed coloring areas. The live paint process thus became much more tedious
as I had to either fine tune the gap-fill, or go into the pen tool and move
many of the lines closer together to enclose gaps so that I could easily color.
The solution? Quite easy, but I’ll get into that tomorrow. . .
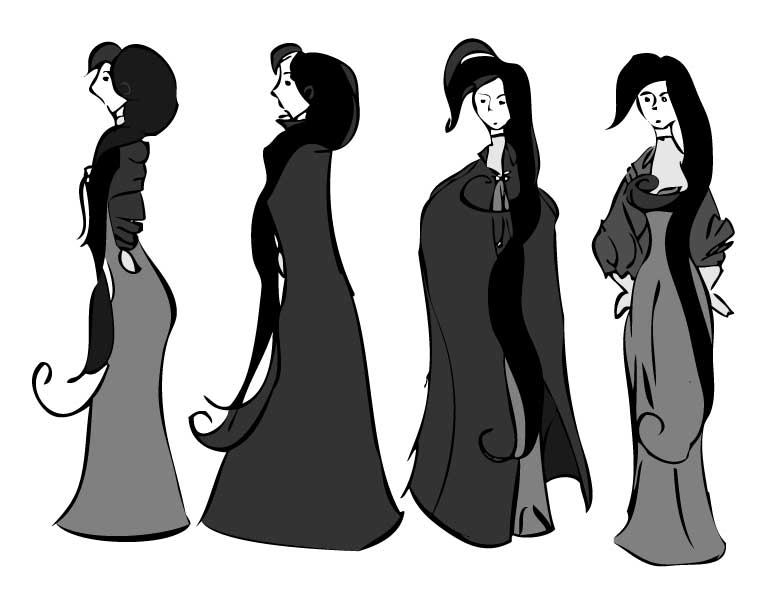
Let me begin my series of filler sketches by going over some character sheets.
In the past months, I’ve sketched the characters over and over again. Some
character like the Dwarf, or Don came naturally to me. I sketched them down
once, thought them satisfactory, and went on my way. Som and Ivan, however,
never felt right. Occasionally, I get a frame where I think “yes, this is
right. This is what Som should look like.” More often, I flounder about and the
only connection from one frame to the next is that she’s the only female caste
member. Thus, this week I present a series of character sketches created as I
tried to nail down her design.
I spent a lot of time sketching Som because some part of me wants her character
to look right and wants her to have the right appearance and a consistent look
from one frame to the next. My lack of proper life-drawing skills shines
through with her character. While Don and the Dwarf can get away with being
abstract boxes and bulbous shapes, I wanted the characters of Som and Ivan to
have more realistic proportions which entailed a less abstract approach to
their characters.
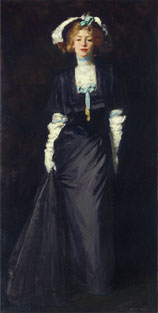
A lot of Som’s clothing is based on Robert Henri’s paintings
from the turn of the twentieth
century. There is something very sensual about how the woman hold themselves in
Henri’s work. They exude a kind of self confidence that makes them seem
powerful and seductive. Certainly, this doesn’t fit the personality of Som.
However, there will come future female caste members who might embody more of
that spirit. Nonetheless, the dresses of that period are so gorgeous in their
complexity. I saw Henri’s painting of Jessica Penn while living in Seattle last
spring and I instantly wanted to find some way of incorporating that dress into
the comic, and behold this Monday, I made it in!
 The
character sheet above is done on standard sketch paper of 8-1/2” by 11” with a
4H pencil then inked with a size #0 Winsor 7 sable brush using Indian ink. I
scanned the image in at 300DPI and 1200DPI using a flatbed scanner. I give
these details only for the more technically minded, but take note of the DPI,
as I found significant changes to the end result based on my initial scanning
resolution. Progressing from right to left I drew Som facing forward and than
profiling the page. The Jessica Penn dress makes its appearance, but I imagine
it will rarely be seen since most of the comic takes place outside and so she
will be wearing her traveling cape through most of the comic. This is quite
convenient as the dress is more time consuming to draw. I am happy with the
results of the profile images as well as the drawing on the far right.
Nonetheless, I am unsatisfied with the front-view cape image as she appears to
be scowling, an effect I didn’t want to create.
The
character sheet above is done on standard sketch paper of 8-1/2” by 11” with a
4H pencil then inked with a size #0 Winsor 7 sable brush using Indian ink. I
scanned the image in at 300DPI and 1200DPI using a flatbed scanner. I give
these details only for the more technically minded, but take note of the DPI,
as I found significant changes to the end result based on my initial scanning
resolution. Progressing from right to left I drew Som facing forward and than
profiling the page. The Jessica Penn dress makes its appearance, but I imagine
it will rarely be seen since most of the comic takes place outside and so she
will be wearing her traveling cape through most of the comic. This is quite
convenient as the dress is more time consuming to draw. I am happy with the
results of the profile images as well as the drawing on the far right.
Nonetheless, I am unsatisfied with the front-view cape image as she appears to
be scowling, an effect I didn’t want to create.
Settings
- Nikon D80 with a 35mm lens (52mm equivalent)
- Shutter Speed 1/6s
- Aperature f/22.0
- ISO 100
- Filter Circular Polarizer
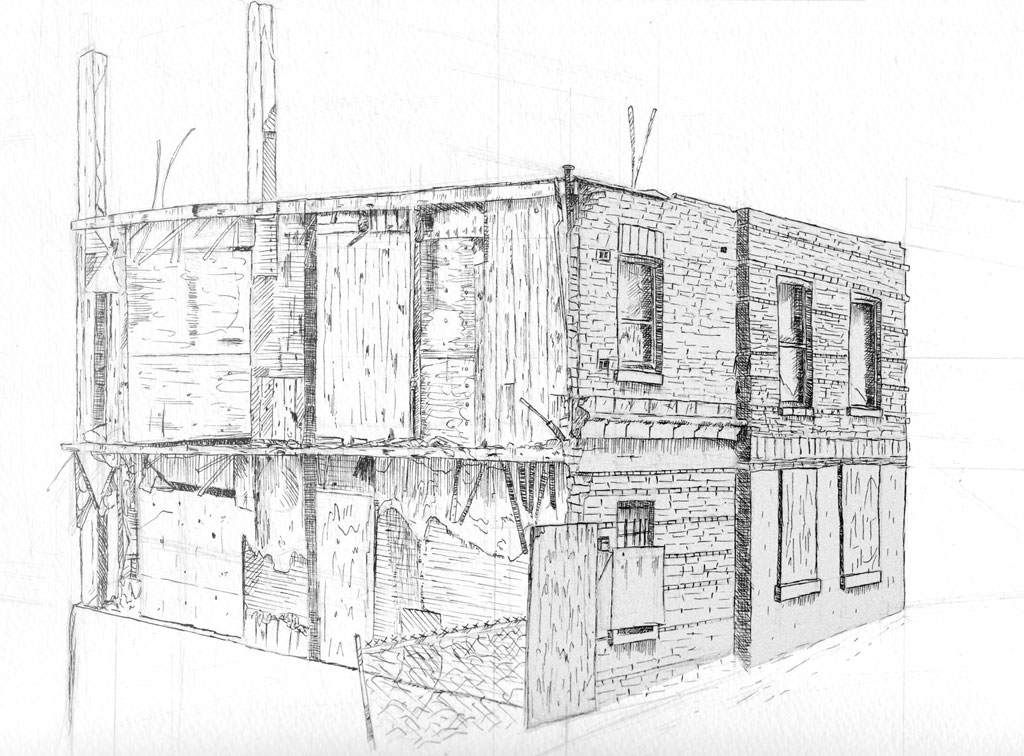
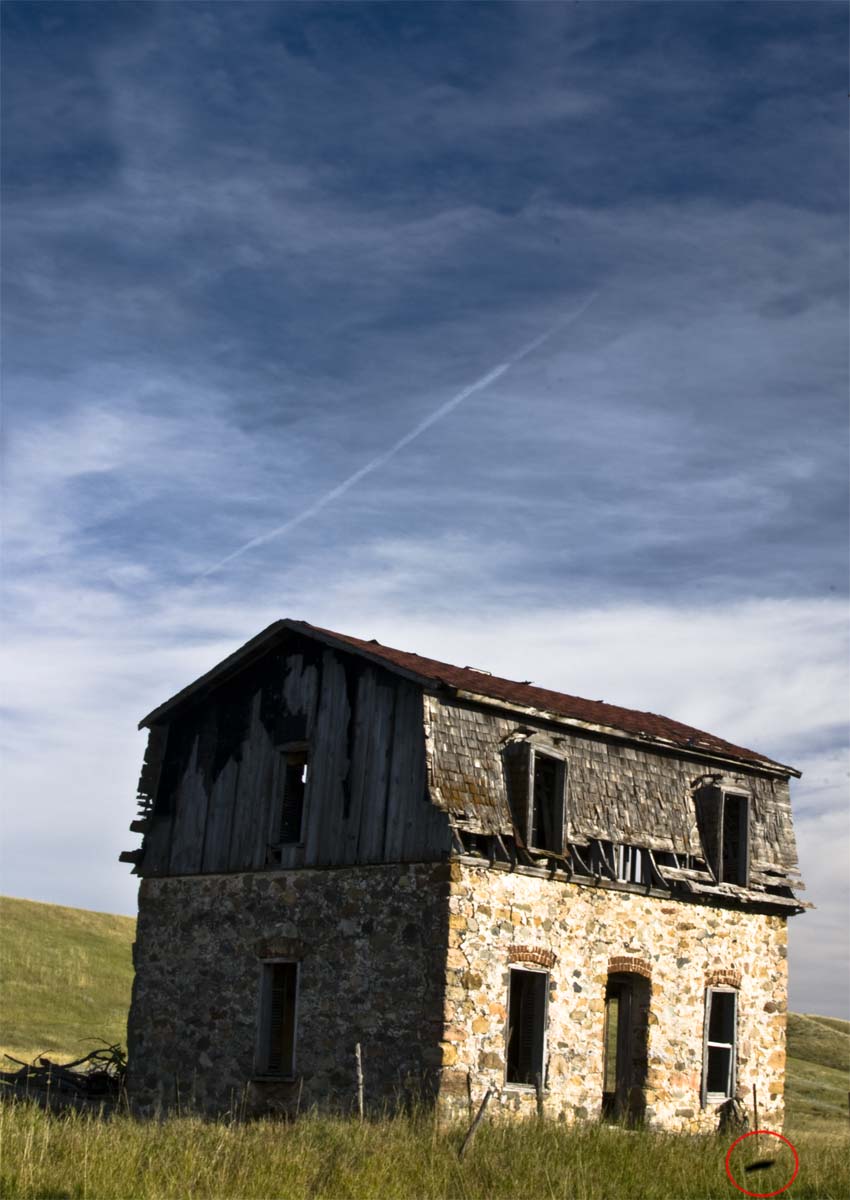
A friend and I went out to St. Onge, SD last weekend to capture some
photographs of the old abandoned buildings out that way. After a hundred shots,
I got home, unloaded them into Adobe Bridge and found this massive spec of dust
on every photo. I checked my filters, checked each lens. Took a dozen practice
shots. I found no dust on any lens, filter, nor saw it in the view screen.
Which left only one place: the sensor.
Now they say you shouldn’t try cleaning the sensor yourself. Supposedly, you
can break it with just a casual touch. I don’t have the money to replace the
camera, nor the money to send it in, so I chance it. I lock the shutter open,
take a small bulb-brush and, holding it just above the sensor, begin to gently
blow on the sensor. I close the shutter. I take another test shot. Camera
works. Dust is gone.
A pity. There’s a giant hunk of dust in every one of those photos. And quite a
few (like this one) turned out pretty good. Guess it’s time for photoshop.
Last night, I took my first stab at cave photography while on a caving trip
with two friends into Jewel Cave. Out of 61 shots taken that night, only two
felt “okay.”

Settings
- Nikon D80 with a 35mm lens (52mm equivalent)
- Shutter Speed 1.3s
- Aperature f/11.0
- ISO 100
- 2 Vivitar 283s with a firefly 2 flash
Jessie Ketchum models on the canyoning portion of Jewel Cave’s Wild Caving
Route. A slave flash fired by Vicki Bierwirth from below lights the corridor
beyond Jessie while a secondary flash, held at arm’s length from the camera,
provides fill for Jessie. I would’ve liked a secondary assistant, and perhaps a
third flash to light the fifteen foot pit that Jessie is straddling. A more
active pose, perhaps with Jessie moving towards instead of away from the
camera, would have enhanced the composition.

Settings
- Nikon D80 with a 35mm lens (52mm equivalent)
- Shutter Speed 1/60s
- Aperature f/8.0
- ISO 100
- Vivitar 283 with a firefly 2 flash and on-camera flash
Again, Jessie sits on the canyoning section of the route, but this time looking
upwards. I instructed Vicki to aim the vivitar at the ceiling above Jessie
while an on-camera flash provided fill light. Although I like the effect of the
lit ceiling, the on-camera flash gives Jessie a flattened look and failed to
properly light her, leaving her too dark against the lighter ceiling. I used
photoshop to highlight Jessie out of the foreground and lighten her, but this
only further reduced the depth of her shadows.
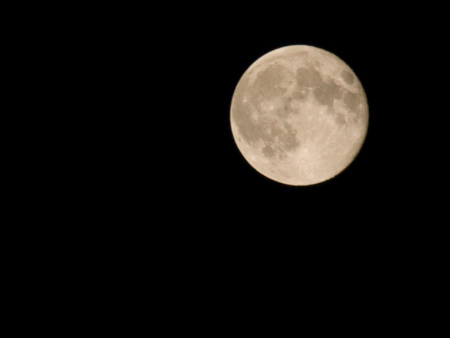
Photos of the moon seem to rarely turn out. They’re either out of focus, too
bright, or too dim. Last night I climbed up Little Devil’s Tower in Custer
State Park and after fidgeting with my telephoto for some time captured one
good image of the moon.
Above is the result. I took this cropped shot of the moon on my Nikon d80 using
the Nikkor 18-200mm zoom lens fully extended to 200mm, a 1/60s shutter speed,
f/11 f-stop and set on ISO 100. The result is my first sharp image of the moon.