Auto-correct Your Nikon RAWs to Look Like In-Camera JPEGs using Color Calibration in Lightroom 3
Eureka! I’ve solved yet another odd puzzle of digital photography: easily making your RAW file look like what you see on your Nikon’s LCD screen.
Perhaps you have just made the leap from shooting with JPEGs to shooting with RAW. You’ve already read up on the various deficiencies of JPEGS: compression, loss of color data, difficulty of editing and the many advantages of RAW: ability to easily manipulate midtones, white balance and apply color filters in post production. Happily, you start shooting in RAW but there is a problem. The unprocessed photos lack the pop and vividness of your old JPEGs.
When you first open your RAW file in ACR or Lightroom there is a brief flicker as your various in-camera settings (saturation, warmth filters, vividness) are stripped away leaving you with a rather dull looking low-contrast image. This is because your camera saves a small JPEG thumbnail to showcase on it’s LCD monitor. This thumbnail contains all the post-processing features that your camera does on JPEGs to make them pop for the novice user.
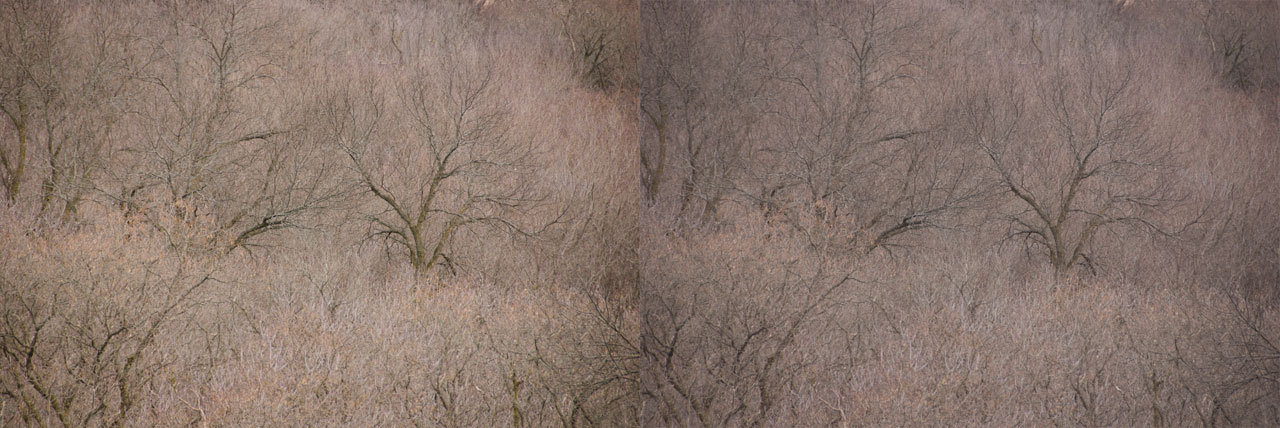
The color calibrated image is on the left while the Adobe Standard is on the right. Note the added sharpness and warmth that calibration brings to the left image.
I used to spend hours messing around with the sliders in Lightroom just trying to recreate the same vivid colors that I saw on my camera’s LCD monitor and all the while cursing Lightroom, Picasa, or Photoshop for gimping an otherwise perfect shot. Only last week did I discover the easy, automated method in Lightroom 3 to bring back the beauty camera’s in-house processing performs. This method is camera calibration. Simply follow these steps:
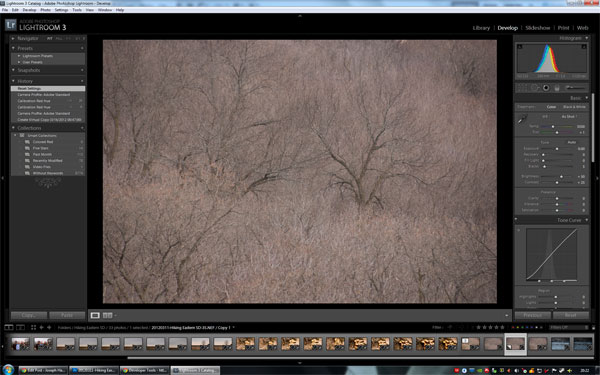
Open Lightroom 3 and select the photo you want to restore to your camera’s settings.
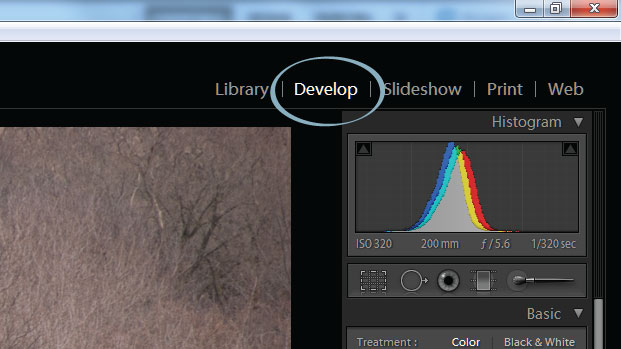 Click on the Develop
tab on the upper-right hand corner.
Click on the Develop
tab on the upper-right hand corner.
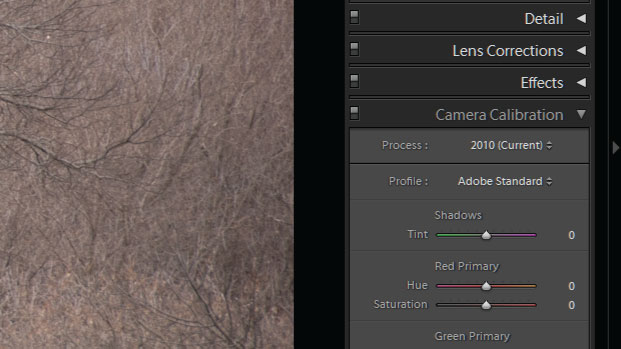 Below the histogram at
the very bottom of the right toolbar is the Camera Calibration toolset
Below the histogram at
the very bottom of the right toolbar is the Camera Calibration toolset
The Camera Calibration allows for manual adjustment of the Red, Green, and Blue values of the image as well as the tinting of shadows. You will find something odd about this tool, namely: adjusting sliders in the Camera Calibration tool will not adjust the Hue/Saturation Sliders or Tone Curve of the image but rather defines a new “starting point” for post processing the image.
While the sliders can be used to make adjustments, the easiest method is to use the presets under the profile drop-down which for my camera (a Nikon d80) gives the options of :
- List item
- ACR 4.4 and ACR 3.6 (this is Photoshop’s defaults)
- Adobe Standard (this is the ugly, bland default for lightroom)
- Camera D2X Mode 1, Mode 2, and Mode 3 (more on these below)
- Landscape
- Neutral
- Portrait
- Standard
- Vivid
The Adobe Standard which comes pre-selected for you also happens to be the blandest of all the profile options. I suggest trying one of the Camera Modes, one of which will most certainly closely match with the image your camera displays on it’s LCD monitor. My favorite is Color Mode 3 for it’s warmth and vividness when shooting nature shots, but it can be too warm and too vivid for portraiture or indoor shots and so this gives a good opportunity for overriding my camera settings to select Portrait or Camera Mode 1 on the rare occasions that I am shooting an event. The Vivid profile is also fairly interesting, but I would suggest using it on a case-by-case basis since it seems to blow-out already bright photos.