Were to begin? This post is a kind of smörgåsbord of random thoughts and musing regarding editing and creating documents. It all really began when I started contemplating learning LaTeX, which lead to a good deal of time spent thinking about what is a document and from there to extrapolating much of the best-practices for web development into a wider sense. Namely, that a web page is merely a marked-up document and that the principles of separating style from content ought be considered in our document processing.
I think that Allin Cottrell says it best: Word Processors are Stupid and Inefficient. This is something, that I think anyone who spends a good deal of time editing text begins to realize. I recall long hours in college editing work cited lists to carefully format them into their specified manners. Even more, I recall hours writing long form Dungeons and Dragons Adventures to submit to Dungeon Magazine and all the pedantic formatting that it required.

Not surprisingly, early on in my computing, I had turned to various forms of mark up for my writing – HTML, simple text files, anything at all to just get away from the mess that was the Word Processor. It seems that I was on to something, even though I was unaware that the problem of separating content from the issues of styling (or more properly: typesetting) had long been a solved problem.
If I were to paraphrase Cottrell’s points about the disadvantages of Word Processors and advantages of typesetting it would be:
-
Text editing allows us to focus on the content and leave stying for latter (Which is often a solved problem if your content is going on a website or submitting to a publication)
-
With separate concerns we can use software like Pandoc to export our text file into LaTeX, PDF, Doc files, HTML, whatever use we want in whatever style that pleases us without needing to go back and edit the content itself.
-
Text is pretty much ubiquitous, it works on nearly every computer and is resilient against file corruption.
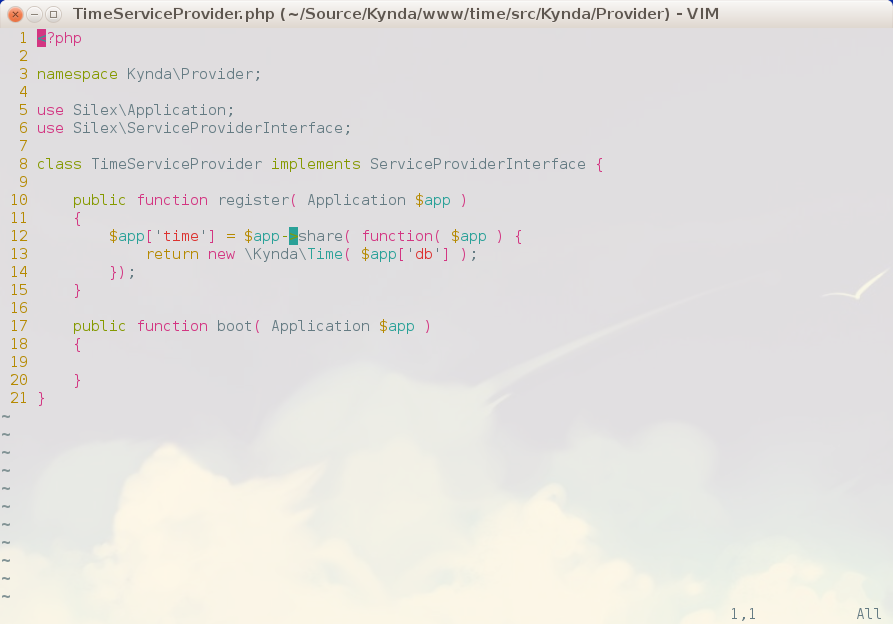
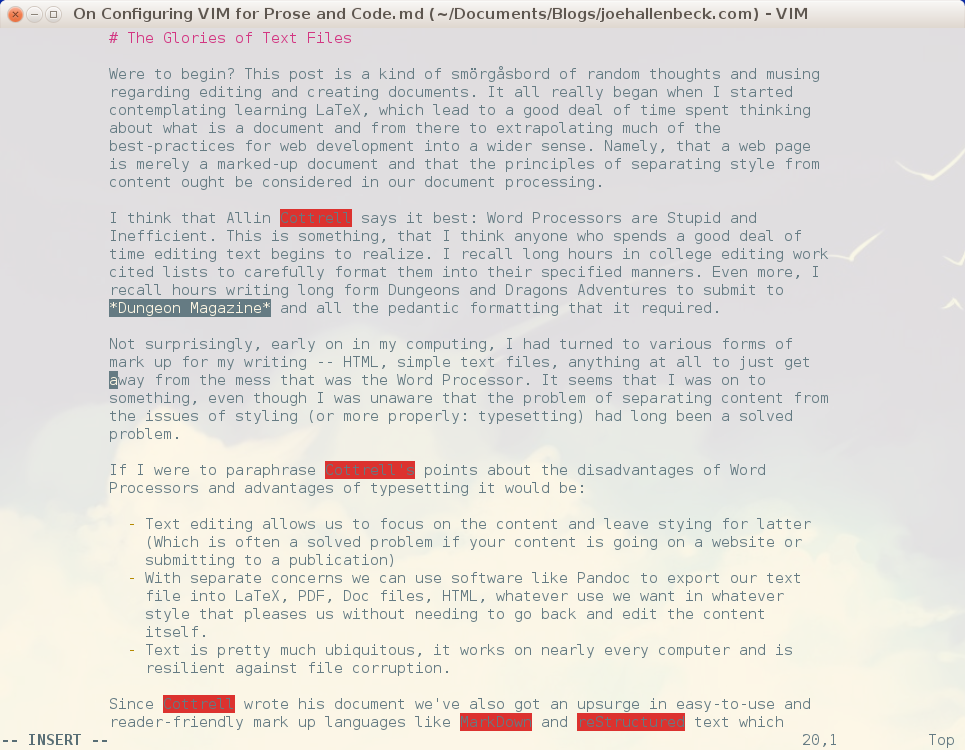
Since Cottrell wrote his document we’ve also got an upsurge in easy-to-use and reader-friendly mark up languages like MarkDown and reStructured text which allows us to create text files that are readable as both a text file and exportable into a format that can be compiled into a beautiful print document via LaTex. In fact, this entire blog is done in MarkDown and as of late, I’ve turned to writing my articles as separate text files in VIM and just uploading them to WordPress after the fact.
VIM
Enter VIM, my text editor of choice. Sublime seems to be getting a lot of traction amongst my fellow developers, but as far as I know Sublime still lacks terminal support – so I stick it out with VIM. That said, I really only started to master VIM about a year ago. Before then, my interaction with VIM was limited to random encounters changing configuration files on production servers. At the time, I only really learned the bare minimum to get by – how to open a file, get into insert mode, and save.
A year ago, I decided I really needed to try to master VIM. So I sat down and did the various tutorials. Made cheat sheets. I got decent at it, but not perfect. Right now, I’m refreshing myself and I’m setting a goal of setting aside NetBeans for my next project to do it all in VIM as well as officially tossing the Word Processor for writing my prose in VIM as well.
For those who want to follow along, I’ve created a public git repository with my VIM configuration.
VIM for Code
If I plan on developing an entire website with just VIM, then I really need to get VIM tweaked out to do exactly what I want for development. Now, I read a lot of tutorials, but I found Mir Nazim’s “List of VIM Plugins I Use with Mini Tutorials” to be a very good start.
I think the take aways from Nazim’s article are:
- Install Pathogen. This is pretty much the go-to package manager for VIM plugins.
- Put your
~/.vimdirectory into a git repository. Move your~/.vimrcinto your~/.vimdirectory and then create a link to it. Get this set up on all the machines you work on and then you can easily sync any change to your configuration across all of your platforms. - Use git submodules to manage all of your VIM plugins.
The Plugins
For myself, I use the following plugins in my VIM install currently:
- closetag Automatically closed open HTML tags
- delimitmate Automatically closes quotes, parentheses, brackets
- fugitive For GIT inside VIM (haven’t made much use of this one so far)
- nerdtree The go-to for in VIM directory navigation and opening files.
- pyflakes For Python Syntax checking
- supertab For word completion
- syntastic For advanced syntax highlighting and error checking code
I’ll leave you in Nazim’s exellent hands for how to install and configure these.
The .vimrc File
A few notes on my choices of settings in the .vimrc file:
set encoding=utf-8
set number
set ruler
set autoindent
This set sets our internal character encoding to utf-8, turns on line numbers and the rule by default. Also, autoindent, because it’s cool.
set tabstop=4
set shiftwidth=4
set expandtab
These three defines our tabs as being four spaces and sets VIM to automatically expand any tab characters into being four spaces.
nnoremap <C-t> :tabnew<CR>
map <C-n> :NERDTree<cr>
This combination creates two new key bindings. First, we can now hit Ctrl+t to
open a new tab in VIM. The second allows us to hit Ctrl+n to pop open NERDTree
so we can navigate around the file system and select files to open. A quick
note: in NERDTree pressing Shift+t opens a file in a new tab. An extremely
useful shortcut to know.
syntax on
filetype on
filetype plugin indent on
let g:syntastic_check_on_open=1
let g:syntastic_enable_signs=1
let g:syntastic_mod_map = { 'mode': 'active '
  \ 'activeIfiletypes': ['python', 'php'],
  \ 'passive_filetypes': ['html'] }
let g:syntastic_python_checkers = ['pyflakes']
let g:syntastic_python_flake8_args = '--ignore="E501,E302,E261,E701,E241,E126,E128,W801"'
let g:syntastic_php_checkers=['php','phpcs','phpmd']
Supposedly all of this should enable syntax checking and highlighting for Python and PHP. Python seems to work quite well. PHP, unfoortunately, requires you to write out the file to see the errors.
Lastly, we want to make word-search a little looser so by default we adjust some of the search parameters:
set ignorecase
set smartcase
set gdefault
set incsearch
set hlsearch
I will skip the WordProcessorMode and CodeMode commands for latter, for now let’s skip to the last three lines:
if filereadable(".vim.custom")
    so .vim.custom
endif
These three lines sets up VIM to look for a .vim.custom file in the directory
that it is running from and then essentially append it to the end of our
.vimrc. This allows us to create custom configurations for VIM on a
project-by-project basis.
VIM for Prose
I began this talk with a discussion on why we should use a text editor for editing our prose. VIM works extremely well for writing code. I am not yet entirely sold on it being the editor for prose, although I do think that any prose-text editor had better come with VIM bindings to be worth its salt.
Right now, I am using VIM to write this and will probably be using VIM to work on a lot of long-length prose. This gives us a number of great advantages:
- Files are small
- Files avoid corruption. Imagine this, if one byte of this file gets corrupted what happens? I have a misspelled word. If this happened in a binary file who knows if it could be recovered.
- I can use my programming skills to do such things as incorporate tables via comma-separated-files, images, or break this out into separate files and compile them into a larger document.
- I can write it using whatever mark up language I want (in this case MarkDown) and then use a converter like Pandoc to export into nearly any mark up language or file format.
- I can take advantage of all of VIM’s keyboard functions to keep my hands on the keyboard and my mind in the flow of putting words on paper.
So what have I done to get VIM working for prose? I dug through a lot of tutorials and even used Vimroom for a while. At first, I loved Vimroom, but over the course of a week the bugs and poor user interface and the abandon-ware feel of Vimroom lead me to abandoning it.
There’s a number of bugs that simply annoyed me. For example, the some color scheme throws all kinds of errors when toggling Vimroom, and quiting out of Vimroom without toggling it off first requires repeated closing empty buffers to get back to the terminal. There also appears to break the drop-downs in SuperTab causing them to appear but only to allow you to select the first item in the drop down.
So after a week of Vimroom, I set out to roll my own solution. The solution was to add two commands to Vim – :Code and :Prose. These toggle between the settings I want when writing code and the settings I want for prose.
func! WordProcessorMode()
  set formatoptions=aw2tq
  set laststus=0
  set foldcolumn=12
  set nonumber
  higlight! link FoldColumn Normal
  setlocal spell spelllang=en_us
  nnoremap \s eas<C-X><C-S>
endfu
com! Prose call WordProcessorMode()
This snippet creates a WordProcessorMode function and then on the last line,
attaches to a command :Prose. Let’s take a look at each line in part.
set formatoptions turns on an umber of important features. With a we set our
text to automatically wrap when it reaches our textwidth values. In this case,
it is 80 characters. Next, w defines our paragraphs as being separated by a
blank line. t sets our text to be automatically formatted to text width and
q allows us to use the gq command to automatically reformat selected text.
Note: you can can use gGgq to select the entirety of a document and reformat
it.
The foldcolumn and highlight lines sets a 12 column margin on the left side
of our text and sets the color of that column to the same as our background.
With spell on misspelled words will appear highlighted, we can tab through the
misspelling via [s and ]s to jump to the previous and next misspelling
respectively. Once our cursor is on a misspelled word hitting z= brings up our
corrections options and zg adds it to our personal dictionary. One addition
makes correcting words so much easier:
nnoremap \s eas<C-X><C-S>
This displayed the spelling correction options in an in place drop-down!
Before we forget. We need a function to turn all this back off again if we wanted to jump back into code mode:
func! CodeMode()
  set formatoptions=cql
  set number
  set ruler
  set laststatus=1
  set foldcolumn-0
  setlocal nospell
endfu
com! code call CodeMode()
call CodeMode()
This function resets our environment back into code mode, and of course we call the function on start up as well so we always begin VIM in code mode.
Last: If you, like me, plan on using MarkDown as your prose mark up language of
choice, grab the vim-markdown plugin which gives me excellent highlighting of
the MarkDown syntax.
Vim Color Scheme: Solarize
There is a bunch of color schemes available in VIM via the colorscheme
command, but honestly nothing really beats out the simple, thought out beauty of
the Solarize color scheme.
The problem is getting it to work in the console. You might notice that my repository does not include the popular vim-solarize plugin. The reason? In terminal mode the Solarize color scheme breaks horribly.
It took a while for me to discover the solution to this problem: change the terminal. Granted, this solution requires you to have a desire to have the Solarize color scheme throughout your terminal experience.
Sigurd Gartmann has a nice repository on git hub that, once installed allows for toggling the terminal into dark or light mode of the Solarized color scheme.
So there you go, a complete walk through for using VIM for both development (in this case web development) and prose writing. Enjoy.